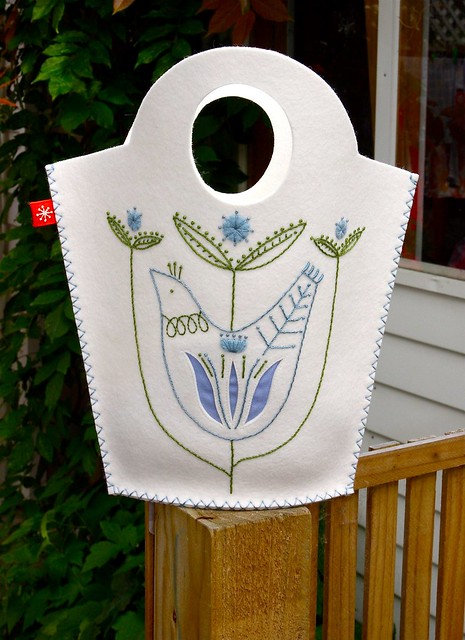
It's done! Man, this took a lot longer to do than I expected, thick felt is tough to embroider through! But it was totally worth the sore fingers. The design is from Scandinavian Needlecraft by Clare Youngs.
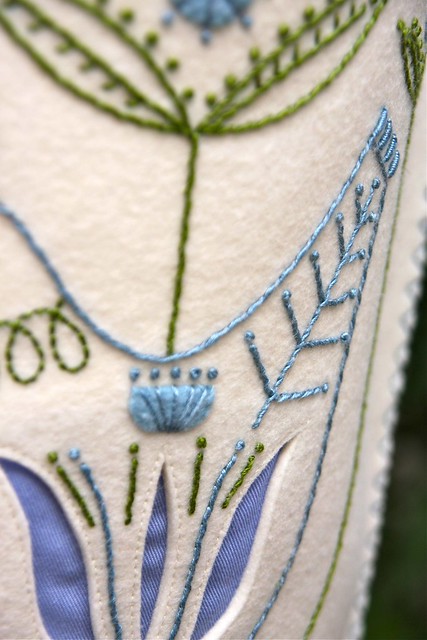
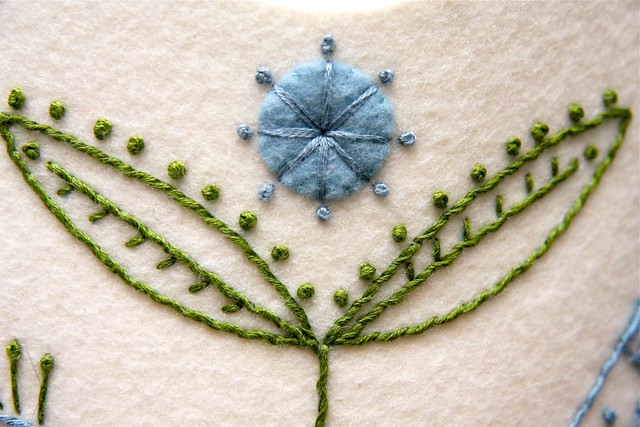
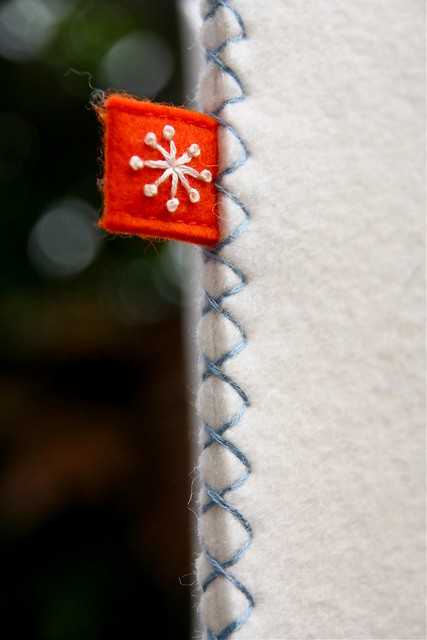
The design itself isn't hard, and the stitches are simple. I've never done a whipped stitch before and while it seemed like double-handling, it gives a lovely three-dimensional effect. I like how the design almost looks like yarn just sitting on the surface.
The instructions say to use "thick felt" but don't elaborate so I really wasn't sure what to use. I went looking and found Jenny Hislop's gorgeous version, and it sounded like just putting together two layers of thin felt wasn't going to really do the trick. In the end I bought the most beautiful 3mm white felt from FilzFelt on Etsy and it was perfect. I got the 1/2 yard and it's not cheap, but I discovered that there's enough in that to do 2 bags plus have some left over for other small projects. It's really just amazing after dealing with the much thinner felts, the body it has is unique - plus it still smells like wool a little bit which makes it nice to work with.
In general, although the instructions are perfectly adequate, I did rather want a bit more detail in terms of stitch spacing and construction techniques. So I thought I'd just pop down my thoughts in case anyone was casting about for guidance.
- Cut it with a rotary cutter, even the cut-outs, it gives a beautiful edge. I just used a box cutter to trim into the points of the cut-outs and to get into the corners of the handle. I used a small cutter for the inside of the handle.
- Cut out the front and embroider it before cutting out the back to match it, the front changed in shape and size a bit and then I had to trim the back down which was a pain.
- You will probably need to tuck in the raw edges of the fabric behind the cut-outs and stitch it down to avoid fraying and to keep it tidier inside.
- I did the cross-stitching down the side spaced 10mm and 5mm in from the edge. More tightly spaced at maybe 8mm might have been good too, although more work! I marked the lines out with water-soluble marker to keep things even.
- You can do a lot of the embroidery without having to come through to the back of the felt which not only makes it much easier to work, but keeps the inside looking tidier.
So now I just have to work up the courage to actually use it - I have a really bad feeling it will get dirty around the handles fairly quickly and I'm not sure how well it will wash. I did briefly consider trying to put some sort of lining in it that would wrap around the inside of the handle but I actually think the thickness of the felt is particularly obvious around the handles and part of the appeal of the bag for me.
I pondered faithfully copying the original after seeing Jenny's interpretation, but in the end I decided that I'd seen the pattern and wanted THAT bag, not anything else, so it's not really a cop-out in terms of creativity. What do you feel about that kind of thing - do you always change things up a bit or do you tend to copy the original as closely as you can?
Fabulous! Gorgeous! Wonderful! I could go on, and I'm sure you wouldn't mind, but I have stuff to do... ;)
ReplyDeleteA gorgeous bag .. You have done a brilliant job :)
ReplyDeleteI do tend to stick with patterns as I am a craft book/pattern addict but if I am working on something off a pattern and I feel it would work out better with abit of an alteration here and there, I do change things around abit
Beautiful, beautiful. You did a nice job on it.
ReplyDeleteIf it were me, I would have had to make it in "dirt brown" color.
White is gorgeous!
Jody
its so gorgeous!!
ReplyDeletethis bag is just wonderful. Great embroidery, so neat and delicate. Thanks for sharing.
ReplyDeleteAlex
Hey, it’s really a good experience. Thanks for sharing this information with us. I like this article. Keep it up.
ReplyDeleteNice
ReplyDeletewritten article.I liked it a lot.Well i must say you have smart written
skills man which is good.Thanks for sharing and keep sharing as like this
always in future too.
i'm new to embroidery.. but i can't figure out how to get the pattern transferred on to the bag! I tried chalk paper (that my fabric shop suggested) but it didn't work at all! what did you use? thanks!
ReplyDeleteI used a water soluble pen and fairly coarse tulle. Trace the pattern off onto to the tulle using a sharpie. It will be faint but quite visible when it's put on top of the felt (make sure it's dry first!). Then trace over the top of that with the water soluble pen, the holes in the tulle let the ink go through. You might need to do some experimenting and go over it again afterwards without the tulle. Hope that helps!
ReplyDeleteThanks! Did you have to wash off the water soluble pen afterwards? Or does the embroidery just cover it up?
ReplyDeleteI just dabbed it with a wet cloth and that did the trick.
ReplyDelete--- Sent from my iPhone ---
I'm an addict too (do we need to start a Craft Books Anonymous group do you think?), and I tend to stick very closely to the pattern/photos if I can, I guess I figure that's what's attracted me to it in the first place so why mess with it? Sometimes though, you do come across a weird way of doing things that is better done another way.
ReplyDeleteYeah, I was pretty scrupulous washing my hands before I worked on it, but how often am I going to manage that when I'm actually using it? I'm just hoping that since it's wool the dirt will wash out fairly easily and won't stain. I have to use it because it would be stupid not to, but I'm going to be paranoid while I do!
ReplyDeleteThanks! And thanks again for your great Valentine's card idea - I have a post about them scheduled for tomorrow because I can't resist showing them off.
ReplyDeleteFirst of
ReplyDeleteall , I should thank you for comment and now coming to the point i
agreed with what you have written.Keep sharing and updating your blog as like
this in future too.
Great article indeed.I really appreciate your written article and must say you have smart written skills.Well thanks for sharing with us.Keep sharing as like this always.
ReplyDelete