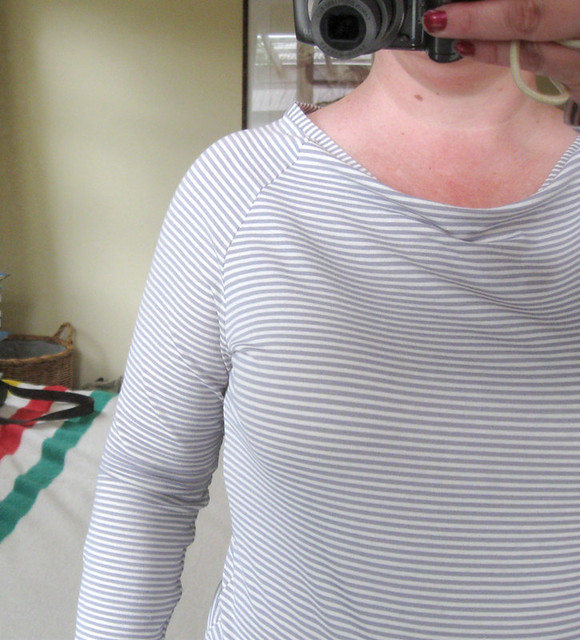
Meh. The fabric is gorgeous but if it stays as is (and doesn't become a tshirt for Hazel) it will be a 'wear under things' top. The pattern is from Burda magazine 2/2010.
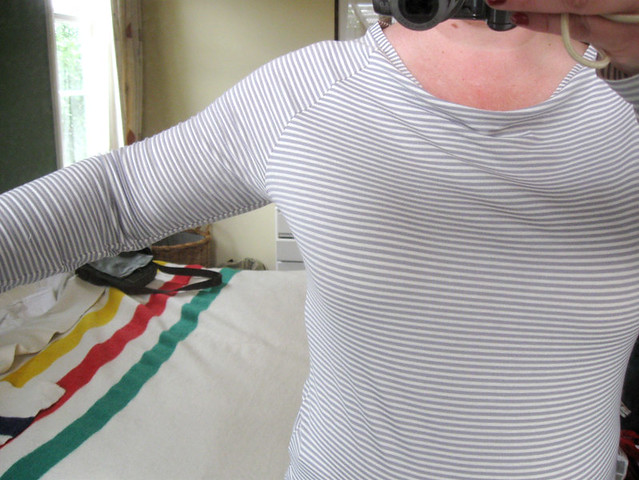
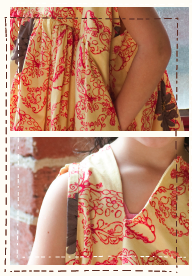
The main problem with it is that it's too small across the shoulders, you can see how the shoulder seam pulls outwards in this photo.
The neckline isn't sitting very well either. In the pattern photo it's quite a wide boat-neck.
And then when I stretch my arm out it pulls again!
To me it looks like the sleeve line needs to come down at a steeper angle. So I have no idea why this has happened - is it a FBA issue? Should I have made the sleeves a bit wider? I don't know! I'm tempted to go back and get some more fabric and try again with a different pattern because I'd really like a tshirt I can wear on its own! I've got the Cal Patch 'Design-It-Yourself-Clothes' and Wendy Mullins' 'Sew-U Stretch' and I think I'm going to just draft my own pattern dammit, enough stuffing around with trying to adjust a pattern to fit me when I could do it from scratch and end up with something decent from the word go. Or at least better than this :P
30 October, 2010
28 October, 2010
CFM - Tunics
Hi to everyone who's put their name down and I have to say it's a big thrill to see that button on a few blogs too, it makes me feel all professional at this and stuff :)
I've been doing a bit of looking around at tunics and investigating the Full Bust Adjustment (FBA) idea. It seems like it's what I've been missing from my repertoire!
What I didn't know about patterns is that they are drafted to fit a B-cup (which simply reflects the size differential from your full bust point to your ribcage). So even if you size up to accommodate your larger bust, you will be making a larger size that's still drafted for a B-cup differential. WTF? That's just nuts. I do not know many women who would be making a size 50 for example, who would have a B-cup. Anyways, this totally explains why tops often don't fit when I've chosen the size for my bust. It's why the tunic I just made is slightly too large everywhere except across the bust (still). There are lots of tutorials online about how to do a FBA. Here and here look like good ones. The book everyone recommends though, and one that's now on my wishlist, is one called Fit for Real People by Patty Palmer. Looks like a must-have if you're planning on making a lot of your clothes. I think I might try making the Summer Shirt again but with the FBA and see how it goes.
I've also hunted down some alternative tunic patterns
The Shearwater Caftan looks essentially the same as the Heather Ross one I made
The Patricia Tunic, the Shana Bell Sleeve and the Tribeca Tunic are much more structured garments
The Schoolhouse Tunic is the most similar to the tunic I have that I'd like to replicate, although it looks a bit boxy - but it might just be that particular fabric. I think I'd convert the box pleats to soft gathers in the centre. The only issue I can see with this one is that it appears there is no shaping through the bust at all, but I found a tutorial on how to do a FBA when there's no bust dart so it shouldn't be an issue.
I haven't done a search through the commercial patterns yet, there may be good stuff - if you have a great tunic pattern, or have experience with FBA let us know!
27 October, 2010
The Red Quilt
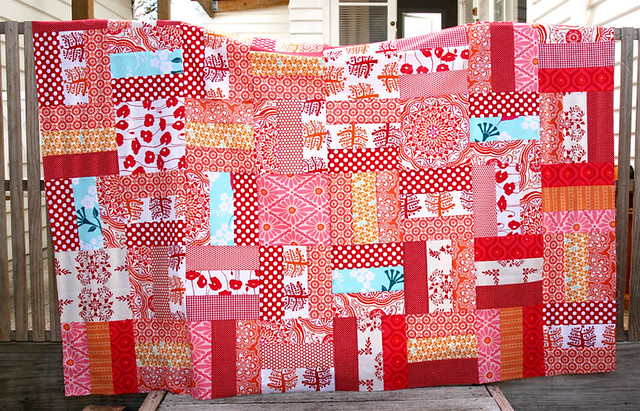
I have a quilt top! I've been slowly making the blocks a few at a time over the last month, adding in a new fabric here and there as I got them. There were a few false starts, like when I cut several strips 7cm wide instead of 8cm, but I got there! I laid them out last week, swapped things around, pondered and swapped and pondered and swapped and then numbered them and set them aside. But then I thought I could just maybe sew a few together, and then it was all the strips and then suddenly it was all the strips together and there was a quilt top.
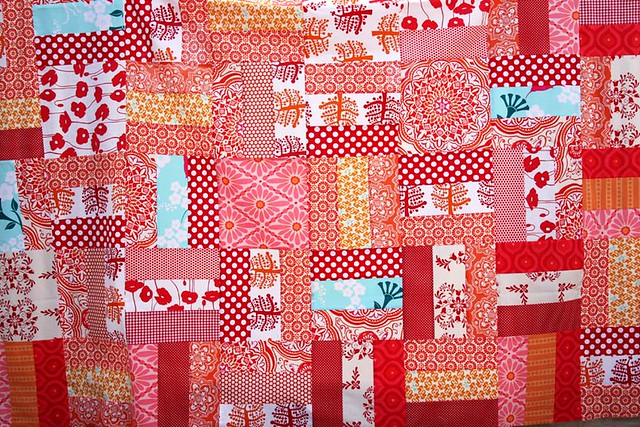
It's 6 blocks wide by 8 blocks long (125x165cm), just perfect for snuggling under on the couch. It's funny looking at in the photo because I can suddenly see that there are some darker fabrics only on the edges and not in the middle, but I guess that kind of thing happens despite your best intentions! You could go mad trying to get all the fabrics not touching another of the same, obviously I didn't manage that in places! I think if I were going to do it over again I'd put more larger prints with white in to break up the fabrics that are solid orange and red, and put less orange in, but I'm very happy with it as it is, and I LOVE the splashes of aqua. I was going to back it with more of the red and orange small circle fabric, but Mat commented that it would be pretty busy and I think he's right, so I got some white fabric with tiny red starburst sort of shapes on it and I think that'll be perfect.
Although I knew I wanted to make a red quilt, I got the inspiration for the style from Red Pepper Quilts (and looking at it just now I can see that she did the large prints with more white) and the technique for the block from the quilt-along over at Old Red Barn Co. I wish I knew what it was called, I think of it as the '3 Strip Block' but the one at Red Barn has 5 strips so obviously you can do different numbers.
I experimented with free-motion quilting for the first time the other night and really enjoyed it, but have sadly come to the conclusion that my machine is not at all good at doing it - at least on such a large scale. The main problem is that the needle doesn't stop in the down position and there is no way to make it do that, so no matter how hard I try I can't stop the fabric shifting whenever I stop sewing. I tried moving it back but it just never started up again nicely. So I'll default the boring old straight lines, although Mum suggested doing diagonal lines which might be quite good. That's fine for this quilt but I still have the Far Far Away quilt to do for Hazel and I definitely do not want straight lines for that - so if anyone has a good quilter they know of and could recommend I'd love to hear about them! Now if only my old machine would break down so I could get a new quilting one...
26 October, 2010
CFM - First item
Summer Shirt from Weekend Sewing by Heather Ross. I've wanted to make this shirt for awhile, although with some reservations because I gather people have had some issues with it. But really, it looks so lovely on this nice lady who could resist?
Some of the complaints about the pattern have been that that the placket is too long, the sleeves are too long and the body is too short. I thought I'd just leave the placket and sleeves as is - the placket could be sewn up (as indeed the instructions suggest) and sleeves are infinitely hemmable. I added several centimetres to the bottom though (like about 10).
Here I am in mine, looking slightly less adorable and not surrounded by flowers
And I'm really NOT trying to be coy with the camera, do you know how freaking HEAVY a DSLR is to hold at arm's length with one hand, while trying to point vaguely in the direction of yourself? Mat and Hazel had our point and shoot with them while they were away this weekend. I did try to put my face in but they mostly came out like this
Nice shot of the neckline and arm though! The picture looks weird because I have the mirror up on the windowsill and you can see out the window on the left there. :)
So what do I think. Well I think that it's not designed for ladies with larger busts. I'm not huge or anything, but I'm a big C cup and I'd say it's more for the B-cup and below sizes. I know there is this mysterious thing known as a FBA (full bust adjustment) and I expect it would have helped here, but I have yet to look into it in a practical sense. Although the top is lovely and airy in voile and I like the long and elegant sleeves and the low placket is all that saves it when you've got a bust (Trinny and Susannah say you must always wear v-necks and it's true!), it's a bit shapeless on the whole. I still like it and I'll wear it, but I'm definitely on the search for a tunic with some shaping. I own a nice one already but I'm not sure how well I could take a pattern off it, it has a lot of pieces and shaping and shirring and I'm not cutting it up!
23 October, 2010
Clothes for Mum Challenge
Time to walk the talk ladies - the Clothes For Mum Challenge is officially on. It's official because there is a button and a Flickr group. Did you know it's distressingly easy to start one of these things up? I must remember that next time I casually mention a challenge thinking no-one would be interested. But no, I'm keen and I hope you guys are too!
The brief is to spend the next month (October 23rd - November 19th) focussing on sewing clothes for yourself. I know Christmas is coming and there are stuffed toys and quilts and ornaments and kid's clothes to be done (or at least thought about in my case) but darn it, we deserve something nice to wear on Christmas Day don't we? We deserve to have some new clothes for summer (or winter for you Northern Hemisphere peeps)! Enough putting it off to make something quick and easy for the kids that you won't worry makes your bum look big. It's oh so tempting not to do it I know, but I've got the fabric and the button and the group and I'm doing it so please join me so I'm not at this party all by myself! Leave a comment below if you'd like to join in, if you have a blog pop in the link too! Anything you've done since I first posted the idea counts - submit it to the Flickr group for us all to admire and be inspired by. I'll compile a wee list of the people who've put their hands up and I'd like to post links to highly recommended patterns or tutorials so if you have any suggestions let us know - for example I'm interested in good tunic patterns that suit someone with a bit of a bust!
Please do join in at any time if you'd like to! So far we have:
Laura
Deb
Pdxolson4
Heleen
The Textured Leaf
Elizabeth
Maryanne
Lisa
Tracy
Melinda
Willy Wagtail
Lin3arossa
DorothyBills
Bellgirl
Here's the button if you're so inclined (the code looks awful I know but it works!)
Labels:
clothes for me,
Clothes For Mum Challenge,
projects,
sewing
22 October, 2010
Playing with the photos
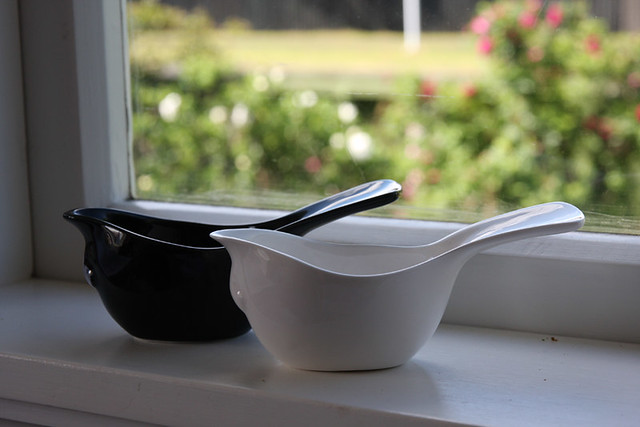
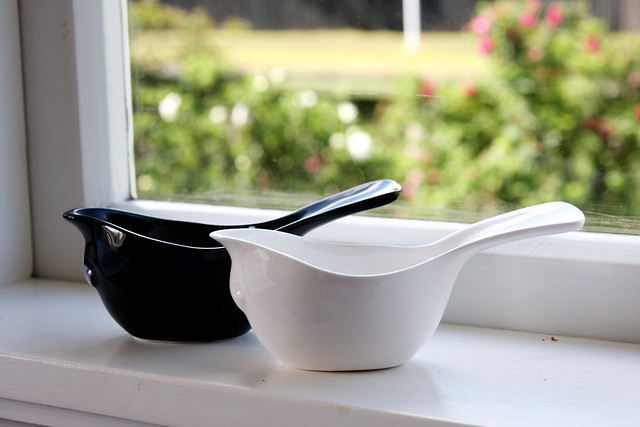
Just recently I've been playing a bit on Photoshop with badly exposed photos where the foreground is darker than background. It's really quite handy! I found this great tutorial on Pioneer Woman Photography that tells you how to do it - what do you think? The trickiest part is painting in the lighter area along the edges but I've discovered if you choose a very soft brush it works pretty well.
Before
After
Before
After
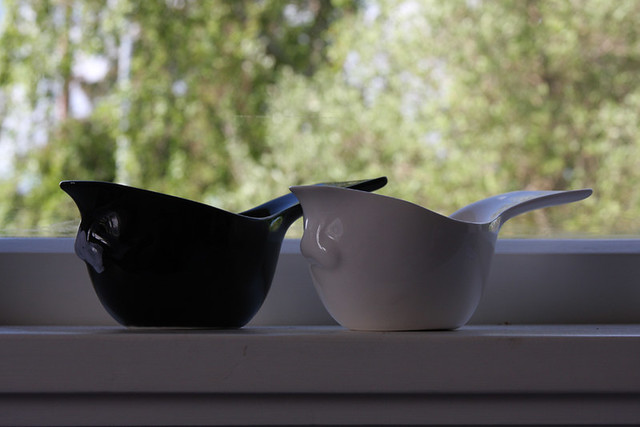
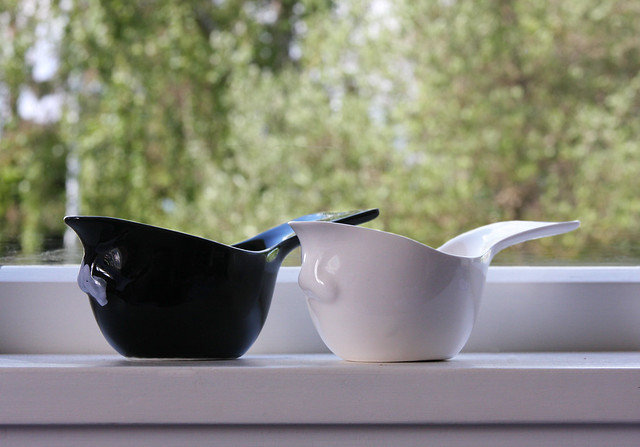
I bought these little sauce boats last weekend at Studio Ceramics, any guesses what they are in the shape of? Mat had no idea you see and I thought it was blindingly obvious so I'm curious what others think!
Before
After
Before
After
I bought these little sauce boats last weekend at Studio Ceramics, any guesses what they are in the shape of? Mat had no idea you see and I thought it was blindingly obvious so I'm curious what others think!
20 October, 2010
Stocking up for a 'Mummy Clothes Week Challenge'...
...of sorts! But really, I participate quite happily in fun challenges like Elsie Marley's 'Kid's Clothes Week Challenge' but where are the challenges for clothes for Mum to get me going? Not that I want to get all organised on this, but if anyone else wants to put their hands up for a wee challenge let me know in the comments! Nothing like an element of competition to move things along. Or a deadline...
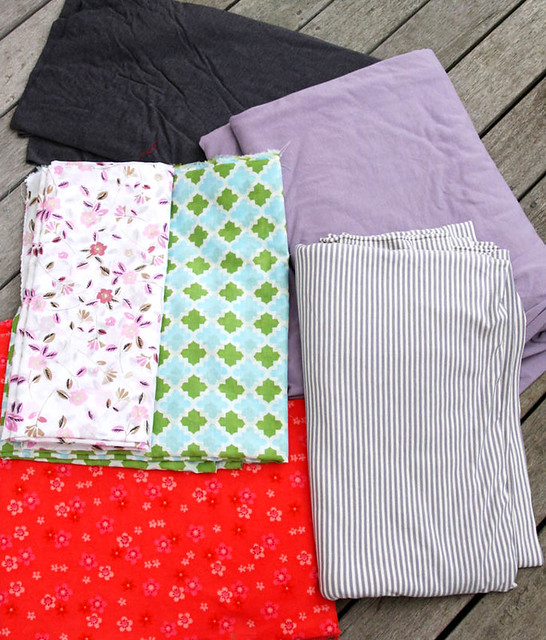
So here is the pile of fabrics I bought last Thursday when my friend Elizabeth came to visit. Oh it's bad enough fabric shopping on my own but when there's a fellow fabric person there it gets a bit dangerous :) We visited Global Fabrics first and I bought the grey knit (oh so silky and soft and Donna Karan!), the striped knit and the rather virulently pink floral stuff (which is for Hazel natch. It's also not quite as intense in RL!) Then we popped over the bridge to Nicks Fabric Sale in Takapuna which had come recommended by Heleen at Ruby in the Dust. Oh the marvels! I'm not really used to going to bargain places like that but I'm totally sold now. I'm always a bit grouchy when Americans post about how they don't buy anything over $6 a yard or something because I'm sorry, fabric doesn't come that cheap here. But wait! It does! It comes at $4 a meter which is even longer than a yard. Ahhhh... And there was fusible interfacing for $1/m. Ok, so the selection was limited, and most of the shop was filled with knits suitable for making polo and rugby tops, but they had some really neat cottons and a table with great off-cuts of posh upholstery fabrics for making cushions etc. I actually recognised some of the fabric as being from Global Fabrics and the guy (Nick?) told us that his uncle owns Global Fabrics so they get their remnants etc. to sell and I can tell you that I paid a LOT MORE for them at Global. Sigh. I hate when that happens! I got the two patterned voiles and the purple knit for 'practicing on' with tops. I've never felt like I could justify practicing on something before!
I've already cut out the green and blue voile for a tunic-style top, have a pattern earmarked for the floral (if there's enough, I need to copy out the pattern and check) and one for the striped knit - all from Burda. Yay for approaching summer! I'm hoping to try printing something on the purple knit - has anyone had any experience with doing that on stretchy fabrics? I'm a bit worried it might crack and look awful. I'm not entirely sure what I'm going to do with the grey knit, probably just something fairly basic that will show off the lovely drape. The pink floral fabric for Hazel - not too sure about that. It's fairly heavy and slightly stiff, with a bit of a stretch. I was thinking a jacket but not sure which one. I'm contemplating this pattern, but I need to look through my Burdas and Ottobre magazines as well. Speaking of which, have you all seen the great clothes in the most recent Ottobre? Lovely and I'm very very tempted. Ok, so I plan to buy it, its just a matter of time and I have to pretend I have some self-control. Actually I'm tempted to subscribe, has anyone ever done that? Is it worth getting them all or a total indulgence?
17 October, 2010
Bokky the Sock Monkey
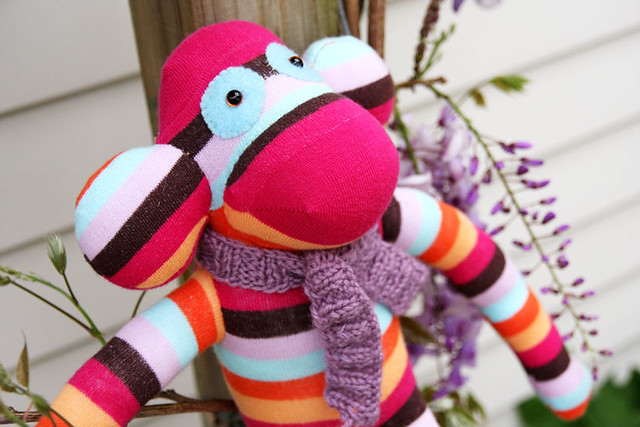
Although it may come as a shock to you all, I'm not the only crafty archaeologist out there! My friend Srey is a dab hand at sewing and knitting, has a Felt shop and even sells at markets down in Christchurch. When she was up in Auckland recently she passed on the most wonderful present for Hazel. Mat arrived home from having lunch with her with one of those classy brown paper bags with paper string handles and let me have a peek - inside was this beautiful stripy sock monkey wrapped up in tissue. To be honest the first thing I thought was that he'd been in some upscale shop and fallen in love with it and had bought it for Hazel on a whim. But no! As Hazel said later while showing it off to one of her friends (in a tone of wonder) "it didn't even cost any dollars"
The bit that kills me (aside from his little knitted scarf) is that he's made from socks. Socks! Srey says she used the tutorial here.
Of course, I did know that such things existed but to be brutally honest, I really really don't like the ones with red mouths. I don't know why but I find them intensely creepy. However, Srey has such great taste in socks I'm a convert to the stripy funky species for sure. Just keep those red ones away from me! I spent quite a lot of time studying Bokky to figure out what bits came from where on the sock. Of course the tutorial explains it all but it was a fun puzzle to solve on my own.
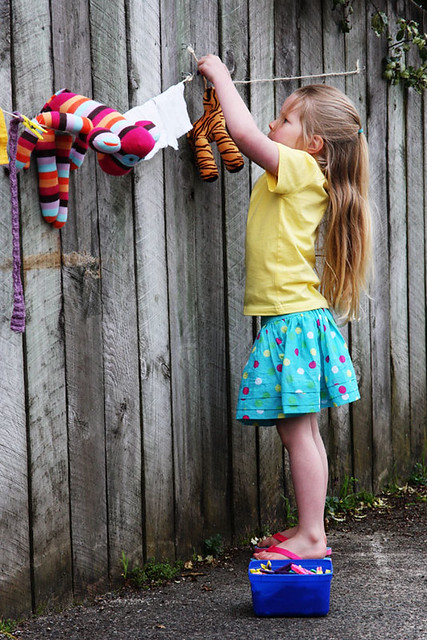
Thanks Srey! He's been well-loved - here he is in action on Hazel's clothes line in our driveway the other day (when it was warmer!)
14 October, 2010
Sew Tina book tour winner and Bouncy Beret giveaway reminder
The random number generator has spoken and it has returned
who is:
who is:
WandaFish 3 days ago |
Could I possibly be so lucky as to win this amazing giveaway? I'm keeping everything crossed and hoping!! This book is definitely top of my wish list and I'm loving the blog tour and seeing what crafters have made of some of the projects.
Hey, it's my girly's birthday this week and it will all be for her, lol.
Congratulations! And Kiwis and Aussies still have another day to put their name in to win the Bouncy Beret here.
09 October, 2010
The Sew Tina! book - Part the Second
[The Sew Tina book tour giveaway is the next post down]
I thought I'd devote this post to talking about the three projects I've done from the book, and have a little giveaway as well. I think I'll have to do yet another post on the projects I'd particularly like to do next!
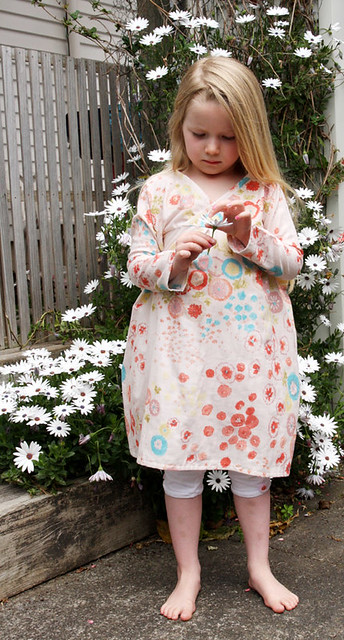
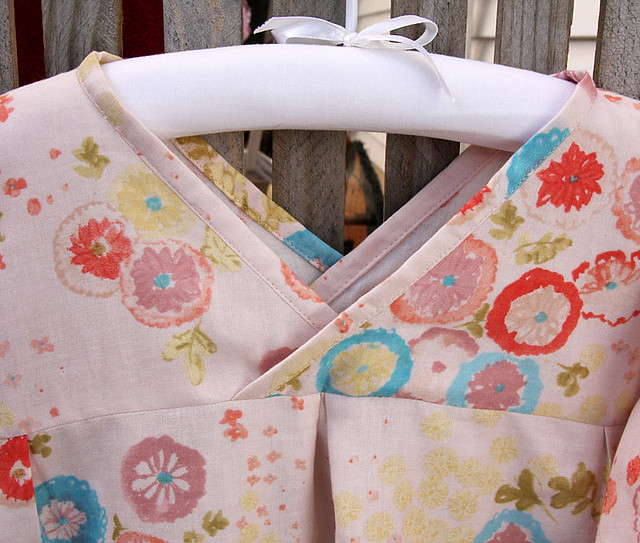
The first thing I made was the Zigzag dress. It only has 6 pieces - two bodice pieces, two skirt and two neck bindings and as you might expect it was super easy to put together. I love the kimono-style neckline and the whole aesthetic of it. Not to mention the gorgeous Nani Iro fabric I used. Hazel on the other hand...well it's just so different than what she's used to I think it will take a bit of getting used to. But look what I managed today!
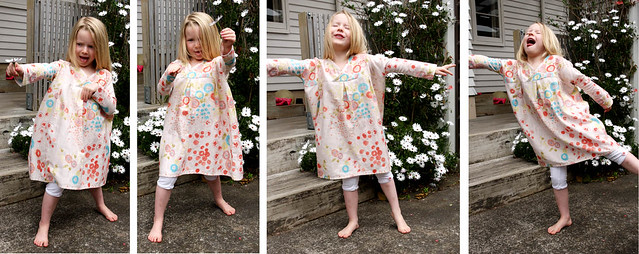
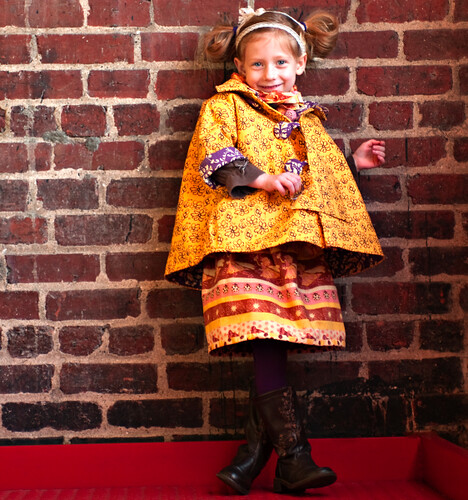
Very exciting - and after the photo shoot she actually left it on for most of the day, only insisting that she needed to change right before we left to go to an ex-pat Canadian Thanksgiving dinner. Darn! But small victories, small victories. The picture above is very sweet and pensive, but really 90% of that set looked more like these (which actually give a better idea of what the top looks like on)
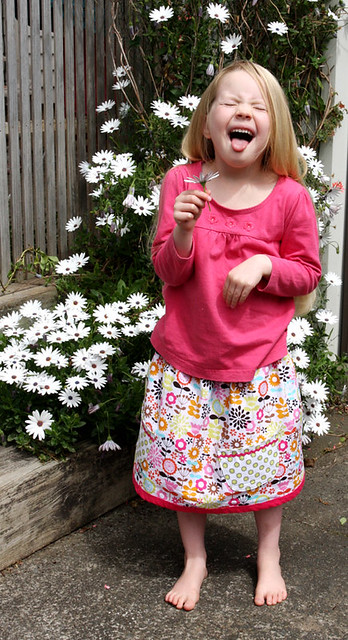
One of Hazel's friend's mum says that Hazel looks like butter wouldn't melt in her mouth, but I tend to think of her more in this kind of light :) "Please" I say, "Please just stand there and smile nicely? No, not like that, put your hands down, stop jumping, what are you pretending to be? Oh, a puppy? Well puppy could you put your tongue back in for a moment? Puppy!" Who'd work with children I ask you?
The only problem I had with it was judging the distance to set the neck edges apart on the bodice. The instructions said no more than 8" which I tried for, but it was hugely too wide and I had to pick it all apart and bring it in. Markings on the pattern to suggest the overlap would have been really useful.
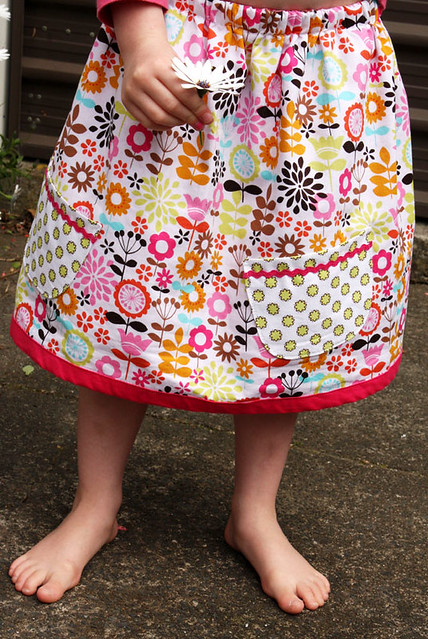
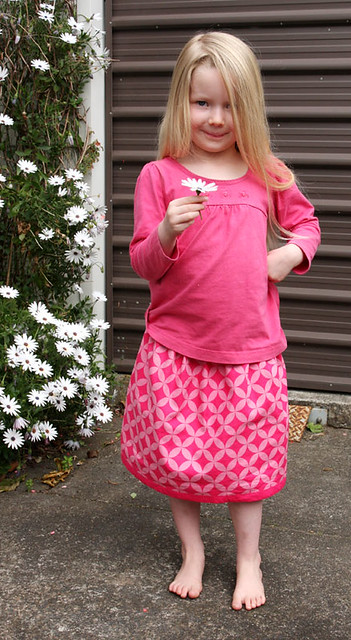
The next item was the Reversible Skirt.
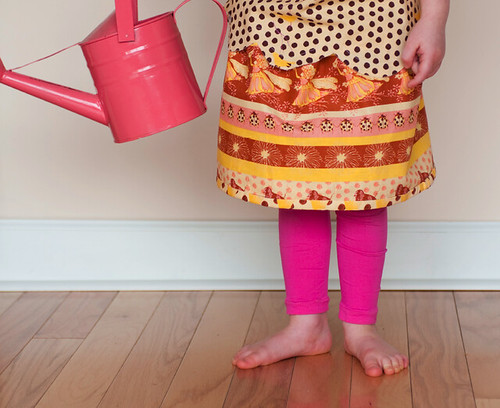
I asked Hazel to pick the fabric and then tried to work with that. Using this kind of bright fabric and putting other prints with it really takes me out of my comfort zone big time. I feel totally lost trying to judge whether the prints go well with each other, whether I'm over-doing it, or under-doing it, ack! It's a very simple pattern though, just two tubes of fabric sewn together at the top with a channel for the elastic, and binding at the the bottom.
When I'd finished with it last night I was slightly appalled with what I'd wrought, but Hazel leapt upon it this morning with cries of delight and put it on immediately. When I saw her in it outside it actually looked much better than I'd imagined it would, somehow it blended in with the rest of the clothes or something. Well as much as it could anyways...
Personally I prefer the reverse side :) Hazel says it's the "autumn side" and the other is the "spring side"
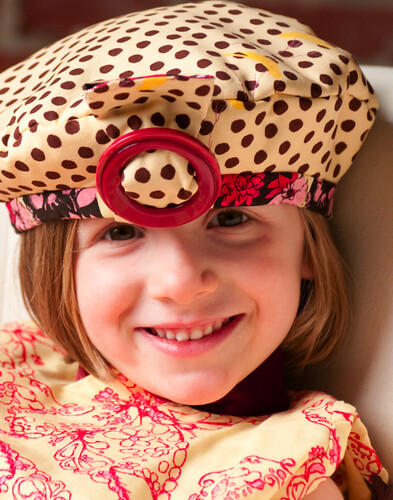
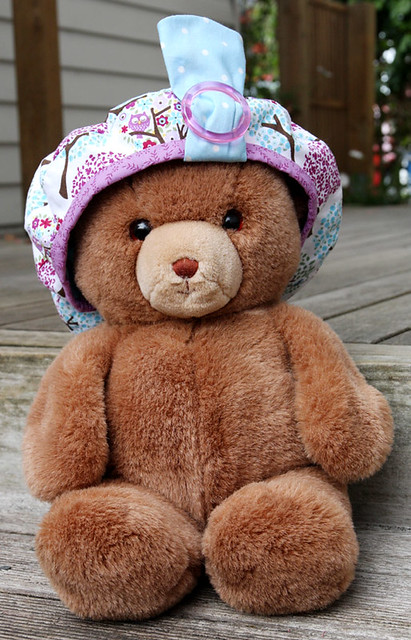
Lastly we have the Bouncy Beret
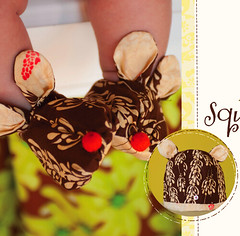
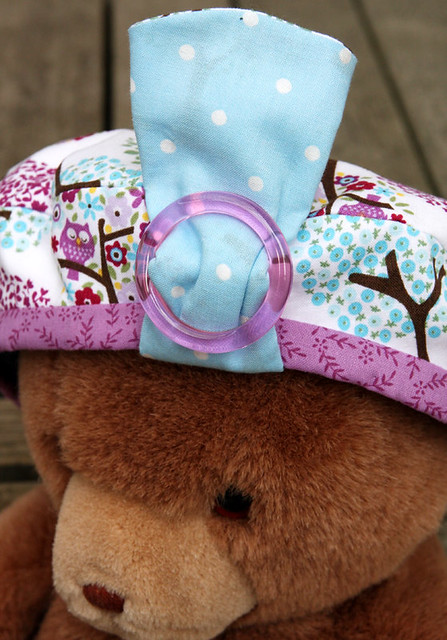
Hazel picked out the outer fabric and I selected the lining and binding. I really enjoyed making this hat, it has a cunning way of using up the inner circles from cutting out the bottom edges - they form the embellishment!
It's being modelled by a teddy because although the pattern says it fits up to age 7 or so, Hazel has been blessed with so many brains that she has a simply enormous head (just like me actually, bane of my hat-wearing life!) and it's too small :( It fits ok around her head circumference but isn't deep enough top-to-bottom. I'll make her a larger one by scaling up the pattern a bit, although looking at the photos in the book they seem to have more depth to them and I'm now wondering if I stuffed up the pattern somehow...maybe when I printed it from the pdf it scaled it down a bit or something?
Anyways! Her loss is your gain - I'm going to give away the beret so that some other little girl can look extra pretty walking down the street. In case you're wondering if it will fit your little muffin, the unstretched circumference of the band is 55.5cm/22" and I can easily make that a bit smaller for you before sending it off if you needed.
I'm limiting this giveaway to NZ and Australian residents only, my apologies to non-ANZAC readers. To go in to the draw simply leave a comment telling me about the best hat you ever wore (or the worst!) and make sure I have a way to contact you. I will use a random number generator to choose the winner on the afternoon of Friday 15th NZ time. Good luck!
I thought I'd devote this post to talking about the three projects I've done from the book, and have a little giveaway as well. I think I'll have to do yet another post on the projects I'd particularly like to do next!
The first thing I made was the Zigzag dress. It only has 6 pieces - two bodice pieces, two skirt and two neck bindings and as you might expect it was super easy to put together. I love the kimono-style neckline and the whole aesthetic of it. Not to mention the gorgeous Nani Iro fabric I used. Hazel on the other hand...well it's just so different than what she's used to I think it will take a bit of getting used to. But look what I managed today!
Very exciting - and after the photo shoot she actually left it on for most of the day, only insisting that she needed to change right before we left to go to an ex-pat Canadian Thanksgiving dinner. Darn! But small victories, small victories. The picture above is very sweet and pensive, but really 90% of that set looked more like these (which actually give a better idea of what the top looks like on)
One of Hazel's friend's mum says that Hazel looks like butter wouldn't melt in her mouth, but I tend to think of her more in this kind of light :) "Please" I say, "Please just stand there and smile nicely? No, not like that, put your hands down, stop jumping, what are you pretending to be? Oh, a puppy? Well puppy could you put your tongue back in for a moment? Puppy!" Who'd work with children I ask you?
The only problem I had with it was judging the distance to set the neck edges apart on the bodice. The instructions said no more than 8" which I tried for, but it was hugely too wide and I had to pick it all apart and bring it in. Markings on the pattern to suggest the overlap would have been really useful.
The next item was the Reversible Skirt.
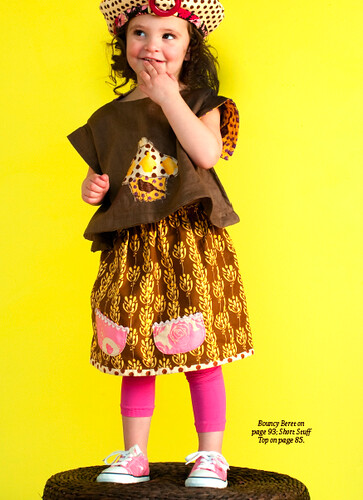
I asked Hazel to pick the fabric and then tried to work with that. Using this kind of bright fabric and putting other prints with it really takes me out of my comfort zone big time. I feel totally lost trying to judge whether the prints go well with each other, whether I'm over-doing it, or under-doing it, ack! It's a very simple pattern though, just two tubes of fabric sewn together at the top with a channel for the elastic, and binding at the the bottom.
(sigh)
When I'd finished with it last night I was slightly appalled with what I'd wrought, but Hazel leapt upon it this morning with cries of delight and put it on immediately. When I saw her in it outside it actually looked much better than I'd imagined it would, somehow it blended in with the rest of the clothes or something. Well as much as it could anyways...
Personally I prefer the reverse side :) Hazel says it's the "autumn side" and the other is the "spring side"
Lastly we have the Bouncy Beret
Hazel picked out the outer fabric and I selected the lining and binding. I really enjoyed making this hat, it has a cunning way of using up the inner circles from cutting out the bottom edges - they form the embellishment!
It's being modelled by a teddy because although the pattern says it fits up to age 7 or so, Hazel has been blessed with so many brains that she has a simply enormous head (just like me actually, bane of my hat-wearing life!) and it's too small :( It fits ok around her head circumference but isn't deep enough top-to-bottom. I'll make her a larger one by scaling up the pattern a bit, although looking at the photos in the book they seem to have more depth to them and I'm now wondering if I stuffed up the pattern somehow...maybe when I printed it from the pdf it scaled it down a bit or something?
Anyways! Her loss is your gain - I'm going to give away the beret so that some other little girl can look extra pretty walking down the street. In case you're wondering if it will fit your little muffin, the unstretched circumference of the band is 55.5cm/22" and I can easily make that a bit smaller for you before sending it off if you needed.
I'm limiting this giveaway to NZ and Australian residents only, my apologies to non-ANZAC readers. To go in to the draw simply leave a comment telling me about the best hat you ever wore (or the worst!) and make sure I have a way to contact you. I will use a random number generator to choose the winner on the afternoon of Friday 15th NZ time. Good luck!
08 October, 2010
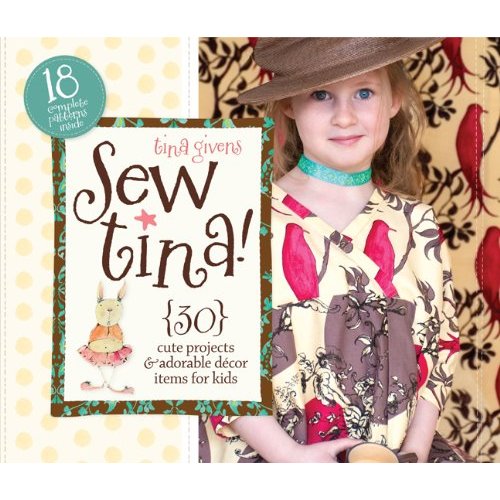
The Sew Tina blog tour and giveaway!
I was really excited when Lark Books asked me to participate in Tina's blog tour because I love her fabric but was completely new to the patterns so it promised to be fun! I had the pdf of the book for a wee while to start with, so I could get going on a couple of projects, but I didn't have much of a sense of it as a whole until it arrived in the mail and it's really lovely. Perhaps I'm a bit old-fashioned but there's something about having an actual book in my hand and pages to turn! Plus it's beautifully laid out, with a nice spiral binding so it stays open, and the patterns are on nice heavy paper. It's built to last!
It's divided into four sections: Introduction, Sewing the Tina Way, For the Little Ones, and For the Bigger Ones. There's also a bunch of sections at the back with resources, templates and a handy-dandy metric conversion chart for us metric people who are a bit challenged with inches! There are patterns for clothes, accessories, decor and even a Moses basket for babies, so there's something for everyone - including the mothers of boys! The sizes run from infant up to about size 7 and are roomy with lots of space to grow.
I'm going to kick this off with my interview with Tina, which I really enjoyed very much! No doubt you will begin to see a theme to it - my never-ending struggle to make clothes that Hazel will wear. I know I'm not alone in this so hopefully there are people out there that find some hope in Tina's answers!
Jacqui: In the wide world of books on kid’s clothes yours really stand out, both in style and in use of fabric. Where do you get your inspiration for the clothes from?
Tina: Thanks Jacqui that means a lot. I think the basic answer is from kids themselves. I have a few of my own (lol, twins aged 8 girl and a boy) and an 18 year old... and they are so free to speak and play and move... it would be nothing for my daughter to walk into the room on her hands... and of course Jonty slides in a room on his belly... so from when very young I create and make for them. I have always created garments with an unusual free from silhouette and I enjoy movement in my clothing so it just grows from that!
J: Many of the patterns use your fabric as a focal point, do you design the clothes with a particular print in mind or fit the prints to the pattern afterwards?
T: It works both ways but mostly I think the clothes can be made in any fabric. Even a solid... Because the fabrics are mine I tend to cast them as a priority but have found that if you love a fabric use it.... it will look good in anything you make.
J: The projects have a real whimsical feel to them, obviously designed to appeal to children. As an adult I find I’m often pretty lousy at judging what kids like to wear and have tendencies to want to make more grown-up items for my 5 year old daughter Hazel (and consequently have a few failures when she won’t wear an item!) How do you find the delicate balance between clothes that kids like and clothes mums are willing to make?
T: That's a tough question because they are all unique as we are. My daughter doesn't wear anything I make unless it's for a special event, and sometimes I have to make it in someone else's fabric?!?!? But she's her own person and I don't want to push me on her... she once stood in Target at 5 years old with her hand on her hip, after I asked her what she thought of something I'd found for her, and she announced "I am not funky like you mom!" Well, on that note she picks out everything she wears and I on occasion will cringe. As long as it's not showing her belly or something too old for her I will honor her decisions.
I find making for infants and toddlers (2-almost 4) is the most fun because they will wear anything, 4 and 5 year olds get more opinionated but they have definite ideas whether frilly, sporty or none of the above. So buy fabric they like, show them something they agree on and there you go. And, 6 and up good luck! However, choose things like a nice coat or accessory you both like... this way she gets to wear her t-shirt and jeans but can throw on the coat you made her...
J: Following on from that, it seems as though the way to guarantee Hazel will wear something is to make it pink and frilly, which doesn’t always sit well with me on a number of levels – what’s your experience in terms of the way to a little girl’s heart through clothing? Any tried and true tips?
T: I am not a pink and frilly designer but maybe there's a way to design clothes for that style that they'd like... Jacqui you may have inspired me... the frilly wardrobe for little girls (and their moms approve?) For now I suggest using pink (maybe a softer less saccharine pink), peaches and a tangy fuchsia... soft fabrics, modern prints and solids, frills but soft frills not the kind that stick up from their neck or arms... with a modern silhouetted flavor. And of course sport it up with leggings... love the leggings and tights....
J: I’m going to make up a project from the book in honour of you stopping by on the blog tour – do you have any recommendations for me in my ongoing quest to make clothes for Hazel that we both love?
T: The Zig Zag dress is fun one on the cover [and the one up the top of this post].... mix and match the fabrics and you could even add a frilly along the bottom hem or the neck.... eek.... and thanks for making it... I want to see it....
And here it is Tina! Not being modelled because Hazel's being 5 this week, but it's still gorgeous hanging on the fence. It's made in Nani Iro Fuccra and I plan on having Hazel wearing it at least once a week by the time summer rolls aroud :) It's deliciously light and floaty, with close-fitting sleeves up to about the elbow. I loved it on her but I if I push her to wear it now it'll be all over red rover so I'm being subtle.
Ok, so now the moment you've all been waiting for - the fabulous giveaway. One lucky commenter will win the book, four (4!!) yards of fabric, two boxes of stationary and two extra sewing patterns. Wow.
All you need to do to go into the running is leave a comment below and make sure I have some way of contacting you if you are the lucky lucky (lucky) person whose name the random number generator picks. Did I say lucky? I think I did. I totally want to win this myself to be honest! [ETA: I guess I should put a date down when it closes! I will draw the name on Thursday 14th at 9am NZ time]
Now I'm not actually finished with this book or the projects, but this is a massive post already! Check back tomorrow for more on what I've sewn up so far, a bit more on what the book's like to work from, what I plan to sew (essentially raving about those little mice slippers and how I want a pair), and a little giveaway all of my own!
Follow along with the rest of the book tour here:
9/24 Lark Crafts.com
9/27 A La Mode Fabric
9/29 Quilters Buzz
10/1 Sew Baby
10/4 Sew Chic
10/6 Sew Mama Sew
10/8 Hazelnuts
10/11 Mama’s Pocketbook
10/13 House on Hill Road
10/15 WhipUp
10/18 Quilt Dad
10/20 HodgePodgeFarm
10/22 Pink Chalk Studios
10/25 Fat Quarterly Blog
10/27 The Jolly Jabber
04 October, 2010
03 October, 2010
A is for Apple and P is for Pear
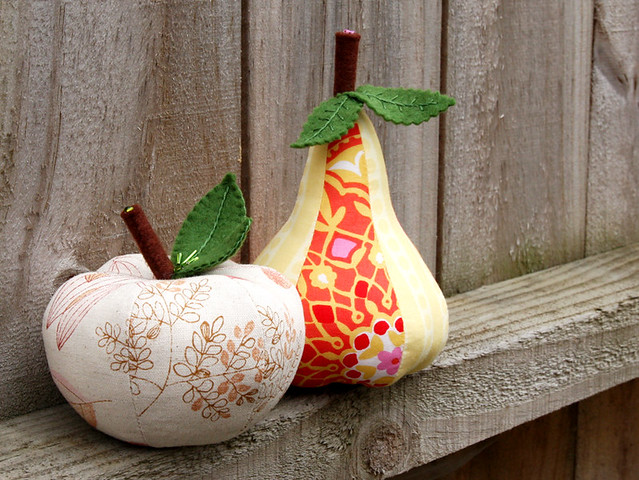
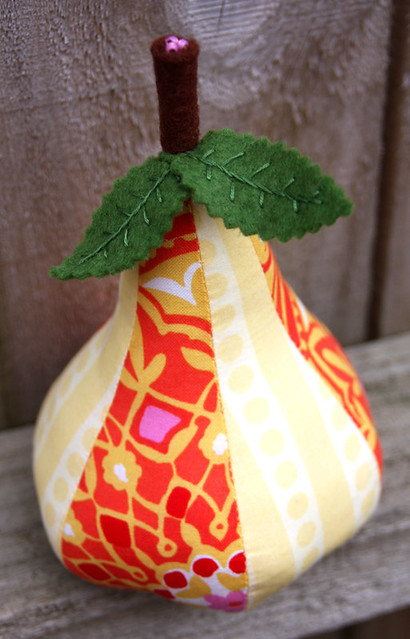
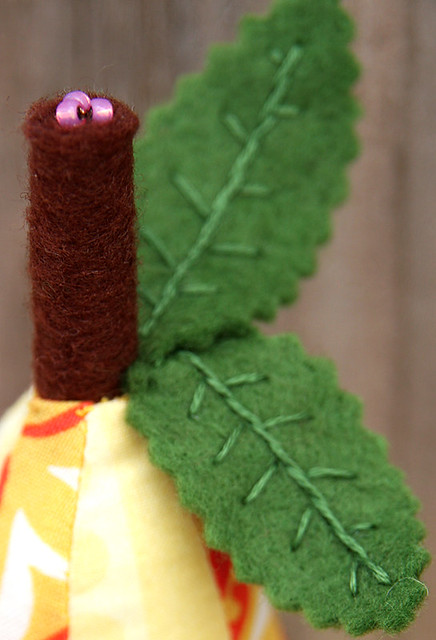
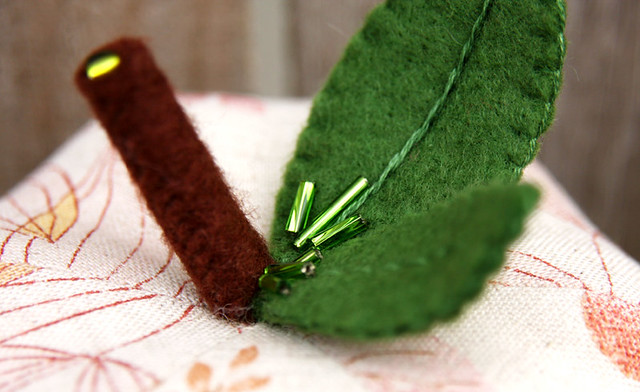
Why did I post about the apple when clearly I wasn't finished with it? The way the post finished just screams "will not be able to leave it alone". So I made another leaf for it, and then a pear, and then because that wasn't enough, I put some shiny shiny beads on both of them.
Beads are very important on functional items like pincushions.
Hazel wants a pear now. She won't wear the clothes I make but she wants a freaking pear. Actually I think she just wants stuff, full stop. (bitter much?)
And I promise I won't touch these again before I send them out. Honestly and promisedly.
02 October, 2010
Pincushion swap - A is for Apple
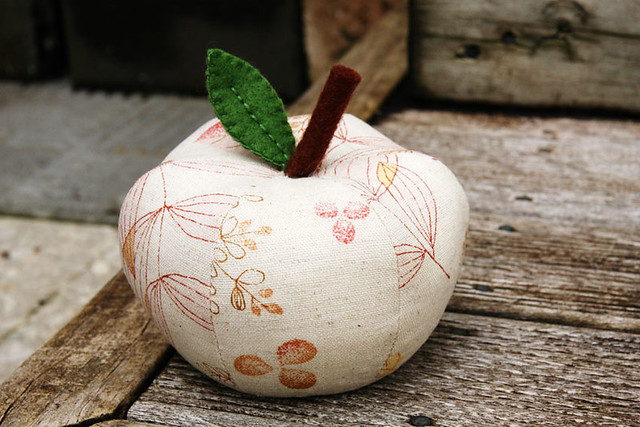
I'm participating in the pincushion swap that Ellie over at Petalplum is organising. This is my first one, made from 'la fleur du lin Herb' by Lecien
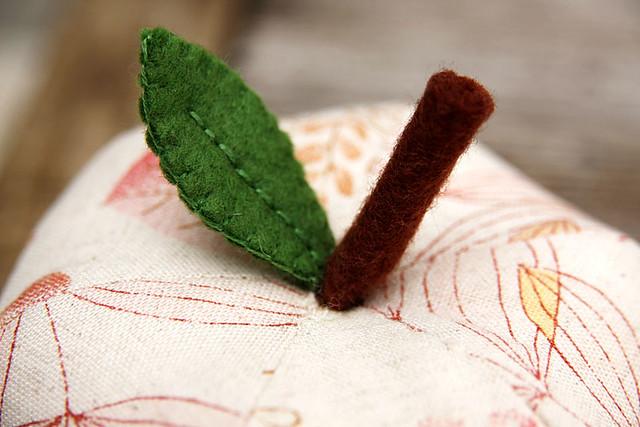
It's from the tutorial and pattern over at UK lass in US. I'm really quite pleased with it but wonder if it needs a bit more 'oomph' or something. You know, a bit of a jzujz (oh you know the term, the one from that program where the gay guys would make over some reluctant straight guy).
On the other hand, it's exactly what I meant it to look like so perhaps I just need to trust my judgement!
ETA: I added another leaf and am now quite content.
Subscribe to:
Posts (Atom)