Showing posts with label patchwork. Show all posts

27 April, 2016

Mercury Burst

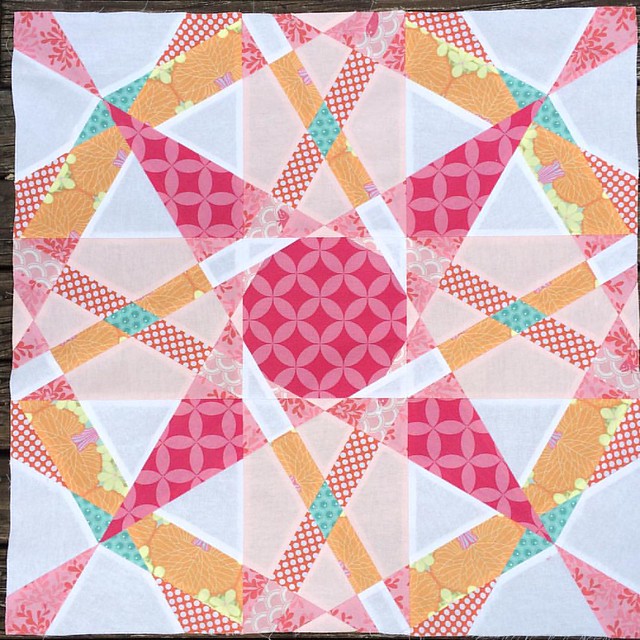
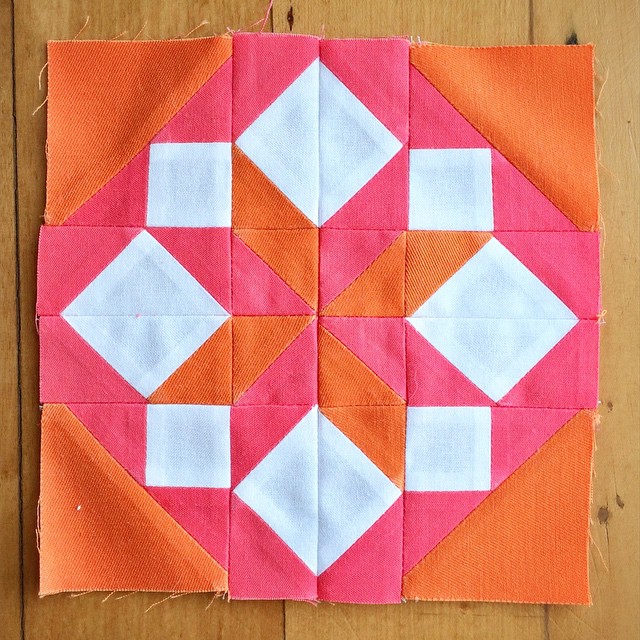
Robyn from robynieland asked if I'd test her Mercury Burst paper pieced block and I leapt at the chance! It looks difficult and fiddly but it's actually not, just involved! The pattern comes with a suggested scheme of lights vs. darks and accent colour placement but also has a blank pattern so you can colour in your own and given its nature you could end up with radically different blocks just by using different combinations of colours. Robyn has some examples on her blog. I decided that as I'm what I'd describe as an 'advanced beginner' when it comes to paper piecing I'd leave the fancy stuff for another time! Hazel needs pillows in her new room and as this is a big block at 60cm (24"), and therefore perfect for a big pillow, I made it in colours she approved of but that I liked too - love pink and orange together!


I hadn't done paper piecing for ages and had pretty much forgotten how to start so I had to look that up. One thing I had remembered was that using a bit of glue stick helps keep things in place. Unfortunately I didn't think far enough ahead so I'd glued into seam allowances and was too liberal with my application (if some is good more must be better right?) so when it came to taking the paper off it was a bit of a fiddly, swear-y, mission in places! Must remember that for next time because when the paper sort of pops off with that ripping along the seam thing it's super-satisfying, right up there with popping bubble wrap.

Overall I'm really pleased with how it came out and would love to do a few more as a quilt one day. The pattern is available from Robyn here. According to Hazel my next project is her super-cool unicorn that has been doing the rounds online lately. Even though she's not particularly a girly-girl Hazel likes to say "you should always be yourself unless you can be a unicorn and then you should be a unicorn". Amen.

02 November, 2015

Hexies

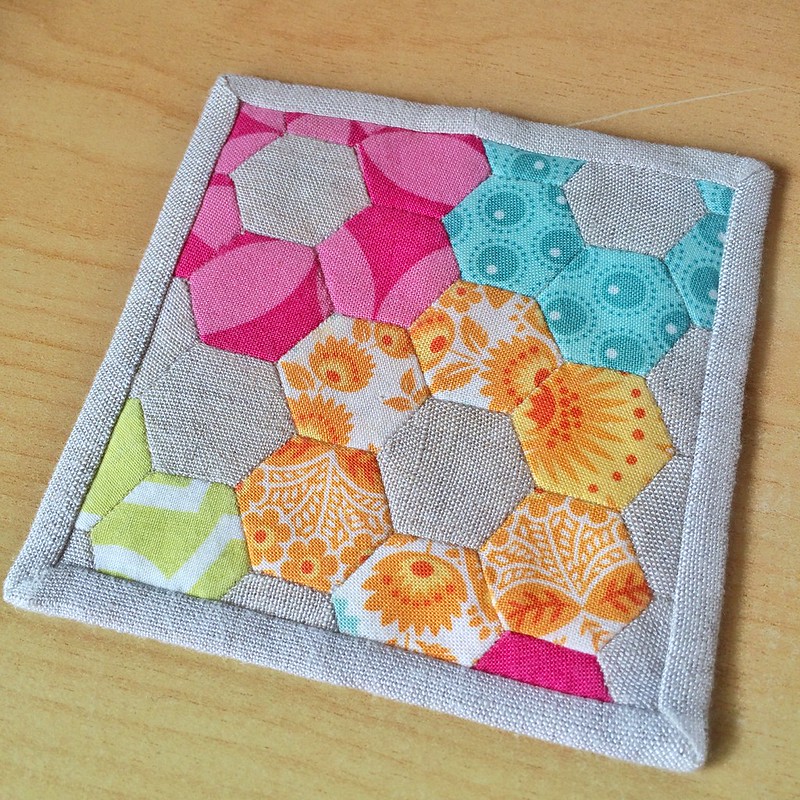
After our quilt show at Alberton we decided to make them some coasters as a thank you for being so lovely and helpful and promoting us as they did. Four inches* square was the size we decided on and whatever we wanted to do after that. I was going to do a postage stamp one with really little squares, but then Mel did something similar and despite the fact she told me to just go for it with mine I thought nope, I'm going to go even tougher than little squares. The only thing fiddlier than that I could think of was little hexies and I knew there was a project with them in one of the Zakka books I have. It ended up not being what I wanted, but there were bright colours and linen, so I found a page of 1/2" hexies online and just whipped out this pretty thing.

Coaster for Alberton

And no I didn't actually "whip it out", it went in fits and starts and I've only just finished it today and our meeting is tonight. I work best to a deadline :D I was going to sew on the backing right sides together and just turn it out, but as I discovered when I'd sewn it all together, it was slightly smaller than the pattern I'd devised and only just made 4" at its largest dimensions. I ended up trimming it square and doing binding which was a pity as I think it looked great cut before the binding went on and the binding itself looks a touch bulky on a small item. I'm not even sure if turning it would have given that really nice straight-edge look but I don't know how you could achieve it without getting fraying.

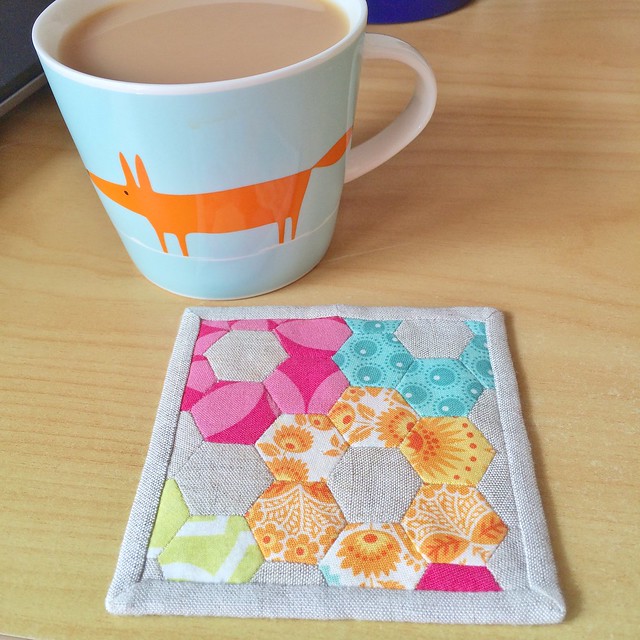
Anyways, it IS pretty and I quite like it, I'd even use it myself I think! Maybe I'll have to make some more, although it's kind of a pity to cover it up with a big old mug, so perhaps mine would be used more like this


Coaster for Alberton

*yes it's kind of weird that we do these things in inches when in all other aspects of life we're metric! At the very least though, quilting has given me some idea of what 5 or 10 inches is, when before I would have had no idea (I visualise the cutting mat markings). Don't ask me about Fahrenheit or pounds though, or how many inches in a foot.

20 October, 2015

All my stuff looks the same

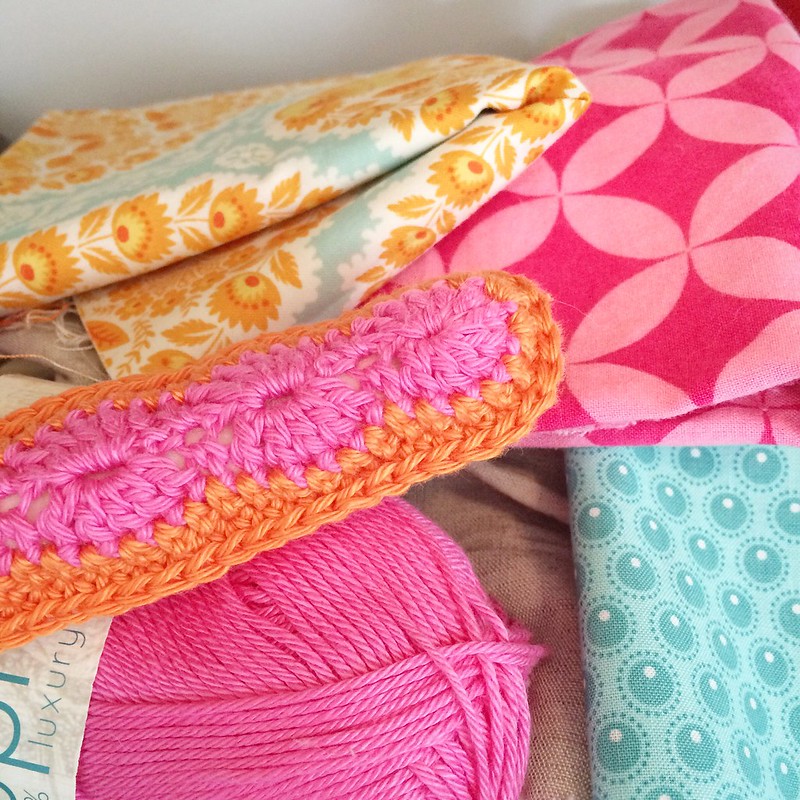
I was sitting on the couch eating breakfast this morning when I looked over and saw this pile on the shelf next to me

Patchwork and yarn parallel evolution.

There is an almost-finished crocheted coat hanger and yarn from that, and fabrics I've been making hexagons from. My first thought was "they all look so good together", my second thought was "they're actually mostly the same colour, I just need to add some aqua to the coat hanger" and then I thought "I'm going to make a matching hanger with aqua in the middle and orange on the outside". And then all my stuff will look the same! :)

17 September, 2015

I've got a style!

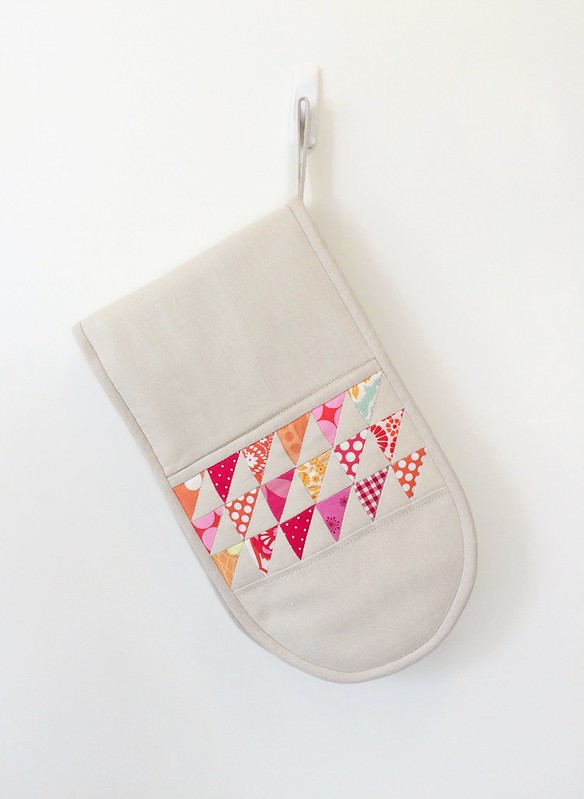
Last Christmas we did a little present swap at our Monday Modern group. I made a pot holder and when Lou unwrapped it she knew straight away who had made it (and so did everyone else). I was puzzled because as far as I know I don't really have a definite style.

Oven mitt with HST patchwork.

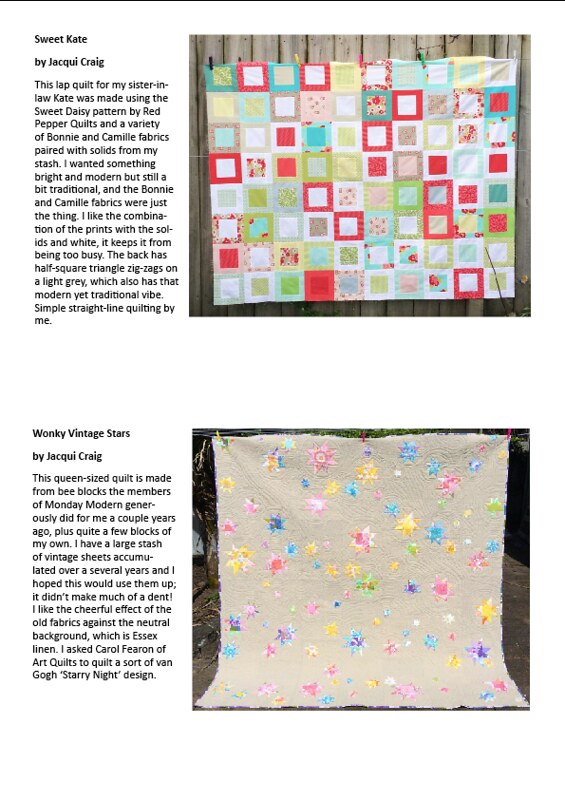
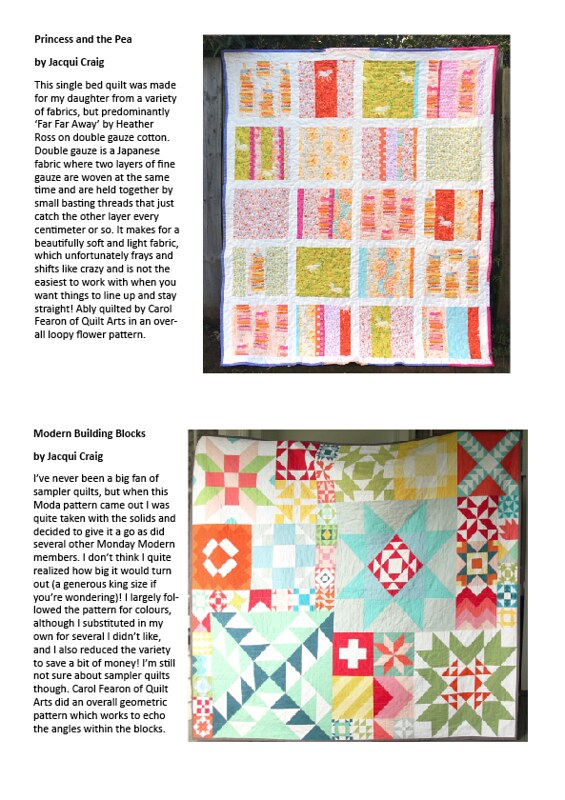
I was wrong, I do! I only just realised it though, when I was making up the info sheets for the quilt exhibition and my four quilts were on the same page briefly. I was quite taken aback when I saw them together like that, particularly the first three, because despite being quite different quilts, they're all remarkably similar when judged purely on colour. The oven mitt fits in perfectly so I can see how I was outed so easily!

My quilts at Alberton
I'm currently working on a red and white quilt and one with Lotta Jansdotter fabrics in oranges and blues and greens so I'm hoping that means I'm not going to typecast myself too much! I think having a style is great, but not if you don't push yourself to do different things sometimes.

14 September, 2015

Modern Building Blocks Quilt

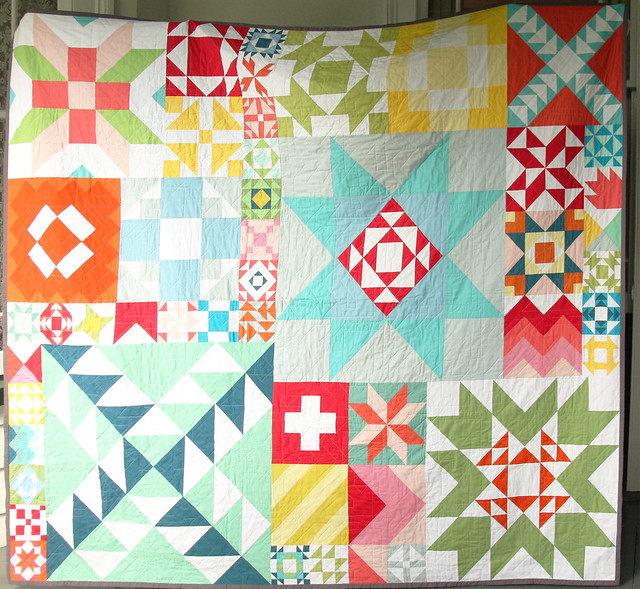
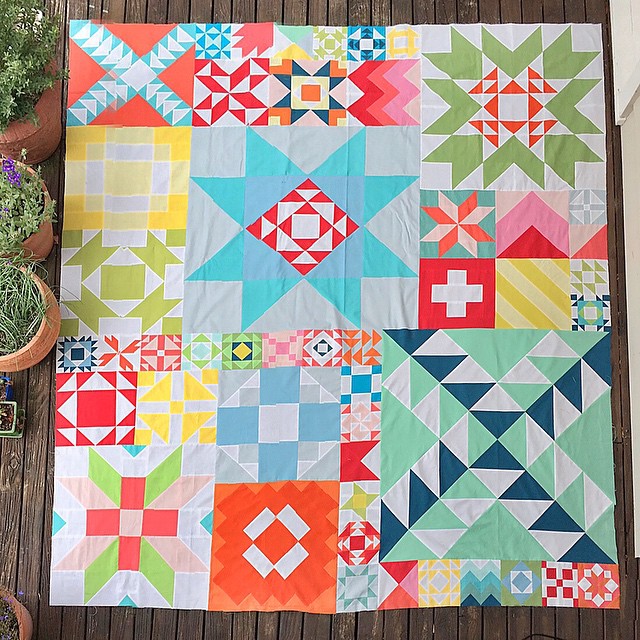
Ages ago I did a post about starting to make the Moda Modern Building Blocks quilt. I did actually finish it quite quickly for such a big quilt (and for me!), but then it went off to a display case at Alberton without a photo of it finished and it's been there for almost 2 months. We finally set up the quilts for our Monday Modern 'New Quilts for Alberton Beds' exhibition and I got a proper photo at long last.

Moda Building Blocks


The colours aren't that great as the only place we could find that was big enough that we could hold it out fully was on the verandah where the lighting wasn't the best. This pre-quilting photo I took for Instagram shows it more clearly.

Finished! It's crazy big, I had to stand on a ladder and use panorama function on my phone to get it all in (hence the distortion). Still think it's super-busy. #modabuildingblocks #modernbuildingblocks #mondaymodern #quilt #patchwork

It was quilted in an all-over geometric pattern by Carol Fearon at Art Quilts in Onehunga. I love the way the shapes reflect the angles of the block patterns. Although part of me likes it for the bright solids and some of the blocks are great and I'm glad I did it, I'm still not a fan of the sampler quilt - they're just too busy and jarring to my eye. Luckily not everyone's like me and it's going to a friend who does like them!

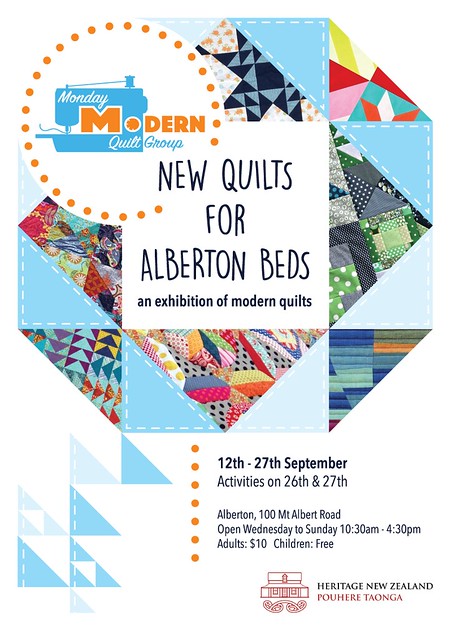
If you're in Auckland come along to the exhibition at Alberton - not only do you get to see a bunch of nice quilts there's a fabulous old house to look through as well!

MM-Alberton-flyer-final-new-date_v2

26 January, 2015

Crafting not blogging

I sometimes think I'm all talk and no action on the crafting front but I've been a busy bee for the last couple of weeks! Mostly I've been making Moda Modern Building Blocks blocks, but there's been some crocheting and other things too. I tend to put things up on Instagram these days and almost forget I have a blog, a trend I've noticed in others too! If you're on IG I'm Hazelnuts

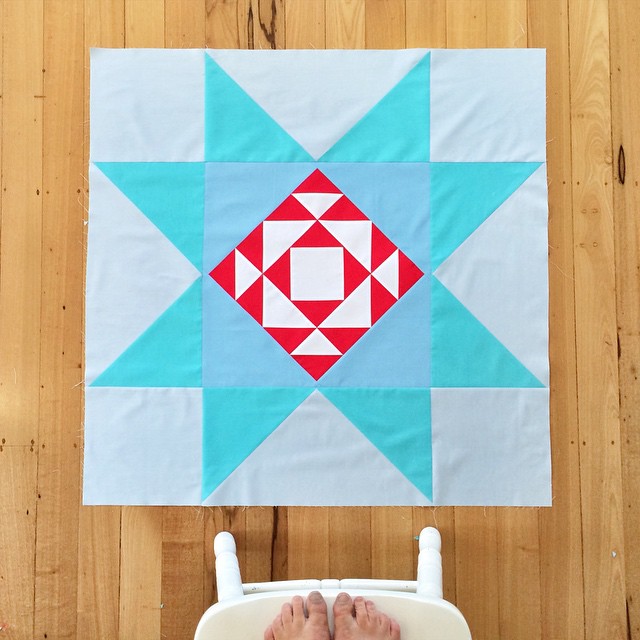
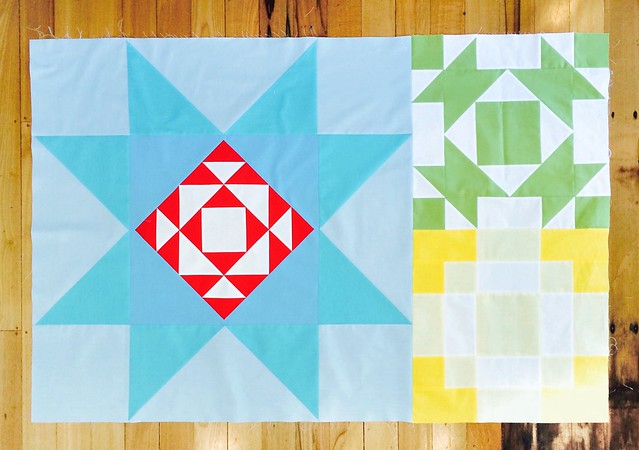
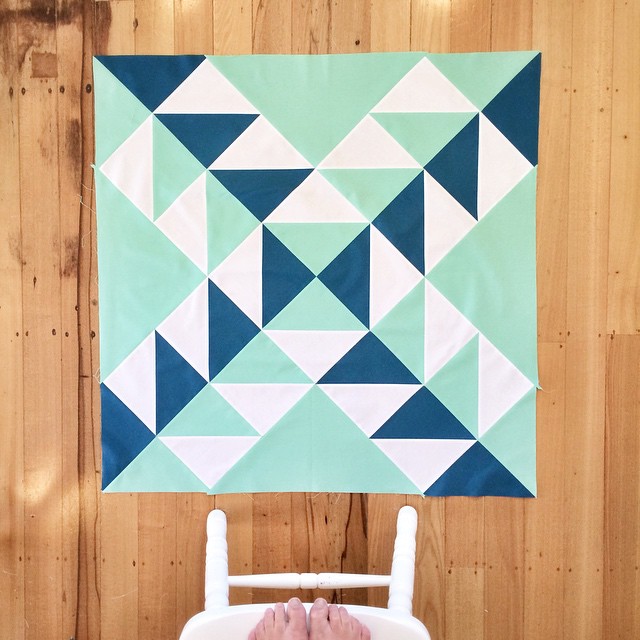
After the solids I ordered online came I got stuck into the first of the 36" blocks. I knew it was big but hadn't realised exactly how big until I made my own. Amazingly it came out quite well considering all the seams on the bias and the fact I wasn't starching or anything.

It's not every day you have to stand on a chair to photograph one quilt block, but now I'm in the #modernbuildingblocks club! The pieces were too large for me to use the blues I wanted so it's not quite like I wanted but I can live with it. #modabuildingb

In fact the pieces were so huge I couldn't use the 1/2 meters I had of a couple blues as they were literally 1/4" too small! I was pretty annoyed, but I don't mind the compromise I came up with too much. I did blocks 5 & 6 next to finish off that section, it's funny how an 18" block seems positively small after 36"!


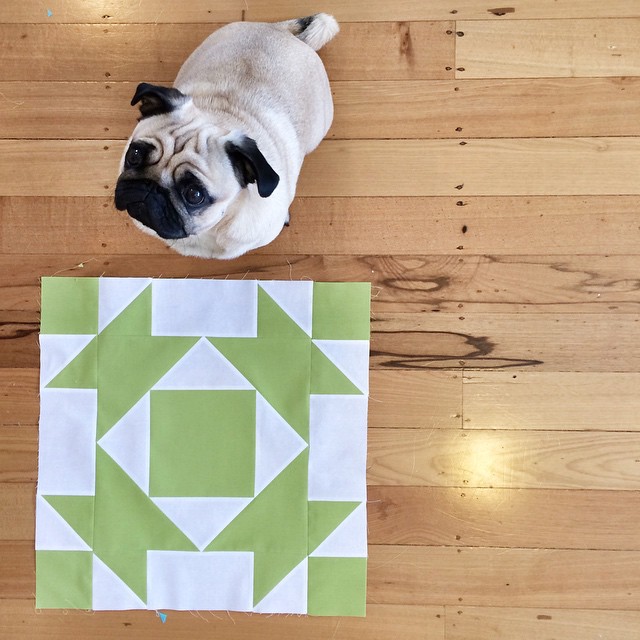
Block 5 and my little helper (who really really wanted his dinner). #modernbuildingblocks #quilt #patchwork #pug #pugsofinstagram #dog Block 6. After all those triangles this was insanely quick and easy to do. #modernbuildingblocks #modabuildingblocks #patchwork #quilt #yellow Section B - Blocks 1, 5 and 6 done

Block 2 sucked, I really didn't enjoy it at all and the bias seams didn't go as well for some reason. Amazingly though, it sits fairly flat considering how awful I thought it would be and I think it will be fine after quilting. I also managed to sew several of the navy and light blue triangles wrong sides together, then I sewed a few with the navy on the left instead of the right and then realised that they all should have been that way but it doesn't really matter as long as they're consistent!

Block 2. Loathed this one! Big pieces on the bias and sewing the wrong sides up several times just sucked the fun out of it. Amazingly, it sits fairly flat! It's also a mirror image of the pattern because I wasn't paying attention at the start. #modabuild

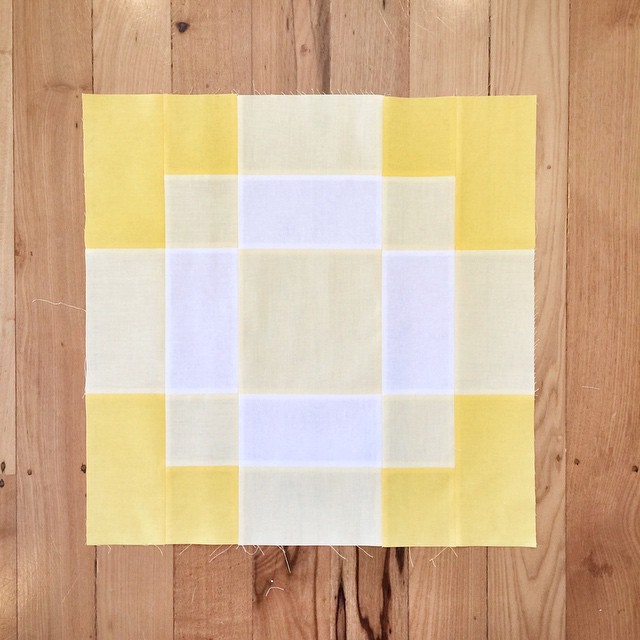
The rest of the Block 2 section is made up of 6 6" squares and I've done 4 of those so far. My favourite was 22, the orange and pink block, although it was definitely the fiddliest! I just love that colour combination.


Block 22. No need for a chair to photograph this one, it's a petite 6". #modernbuildingblocks #modabuildingblocks #patchwork #quilt

Block 25 Block 25. Another 6" but not very exciting. Still, another one finished! #modabuildingblocks #modernbuildingblocks #patchwork #quilt

03 December, 2014

Scrappy colour

I'm at the start of a project for Christmas and have been a bit worried about my colour choices. I had started out with all reds and then had a sudden change of heart and went with oranges and pinks. Doing that always stresses me out because I start second-guessing myself; but as I was clipping corners off I looked down at my pile of scraps and realised that I think they look great together! I've got quite aways to go on this as there's nothing like adding patchwork to a simple object to make it an inordinate time suck, but at least I can relax with my colours.


Colourful scraps

22 November, 2014

November block lotto

I'm not sure why I feel guilty that I did the December block lotto before November but I do! Here is November's made using the tutorial at We All Sew. It's nice making two blocks at once like this and I like the result, although I'm really annoyed that I messed up the direction of the lines in the blue fabric like I did. Hopefully it annoys the recipient less than me!

November block lotto

19 November, 2014

Back sewing

I must admit to sewing burn-out after Hallowe'en and I wasn't at all upset when Mat banned me from the sewing machine for a couple weeks! To be honest, by the end there I wasn't having much fun, the low point being when I realised the reason I'd had such an awful time getting the collar on Mat's waistcoat to fit was because I'd put it in upside down - I must admit to a few tears at that point. I made that bastard fit though! I've eased back into non-fraught sewing with a couple blocks for the Monday Modern Xmas meeting.

December block lotto

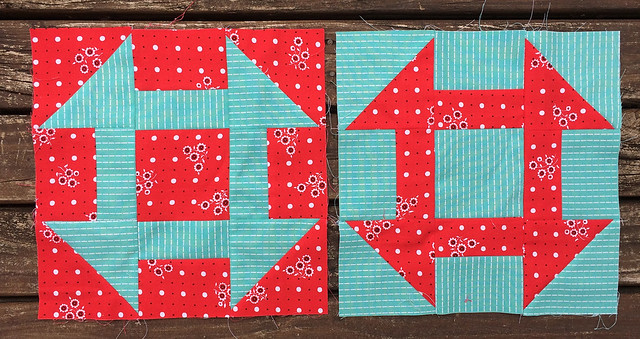
The block is called Migration by Lynne Goldworthy and is in the Love Patchwork and Quilting magazine, issue 11 I think. It was fun to put together and I'm loving all the crisp points and lines. Next up is a churn dash block for last month's block lotto!

05 July, 2013

Bee blocks

Only a week until I head off to Canada for a month! Can't wait. :) Before I go I'm hoping to get my scrappy trip around the world quilt done up for an exhibition the Monday Modern group is having in September. I need to find some time without Ollie around so I can get it all laid out and basted. However, that's time that's hard to come by! The thing about pugs is that they just want to be with you all. the. time. Allthetime. If he's not by my feet he's on them, or trying to be on them, or on my lap. I know they call some small dogs 'lap dogs' but they really aren't good on laps like cats are, Ollie is always slipping off or having trouble knowing where his legs and paws should go. Anyways, despite Ollie and packing I'm hopeful!

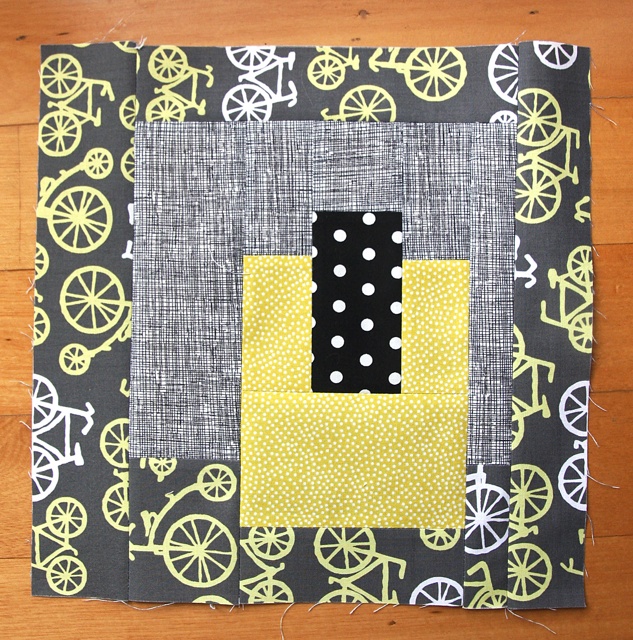
I had the last two bee blocks to finish up for the start of the month, I forgot to take photos of Heather's but here is Stacey's. She just wanted us to do a 12 1/2" block for her, our choice, from the four fabrics she supplied. I decided to have a look through Modern Blocks (the 99 blocks one) to see if anything took my fancy and ended up doing 'Stuck in the Middle'. I really liked it, quick and effective.

Untitled

I've never really seen the appeal of the cross-hatched fabrics, though I know they're popular, but in a block like this I can see their advantage, they really conceal the seams well, as did the yellow dots although they show more in the photo. I thought that made the block even more effective, as the shapes really do look like they're set into each other.

24 April, 2013

Emerging from the fog

In less than two months we've bought a house, put our old one on the market, sold it, packed, moved, and largely unpacked, kept the cat in for 10 days, tried to clean cat pee out of carpets (our old house was all polished floor boards), and after a drought dealt with constant rain and no covered deck or garage to keep things dry until we find a place for them. Yeah. And now I am starting to think about things artsy crafty again - it really does feel like emerging from a fog of packing and boxes and general logistics. When I got to stitching group on Wednesday, after about a month off, I really felt like I was returning to real life!

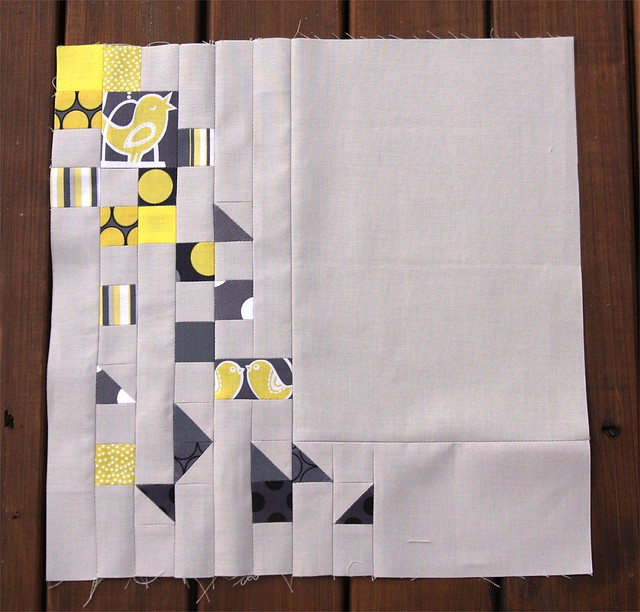
I've also started back on the Monday Bee blocks which I'm shockingly behind on. I had four to do, and I've just finished Carolyn's 'Cheery Canary' improv block. The brief was only 25% of the block in prints, and a canary must appear once. The others had done such great blocks I really didn't know what to do, although I did know I was jealous of Megan's effort which put small triangles and then squares in mind. Eventually I had this mental image of yellow squares tumbling across the light grey, gradually turning into dark grey triangles. I think I came fairly close, although it's not quite as I'd imagined. I think that's partly due to the number of seams in the block which I find kind of distracting, but hopefully they will be less noticeable after quilting.

Bee block for Carolyn

It was quite satisfying to put together!

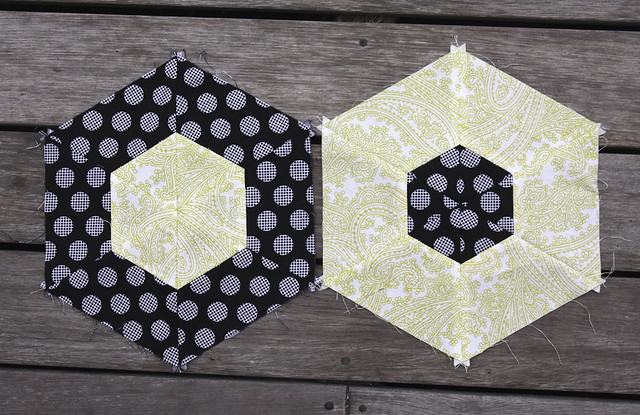
I also found the photos I'd taken of Laurina's and Linda's blocks, both of which were nice to do - I thought the technique for Laurina's hexagons was fascinating, especially the way you end up with two very different-looking blocks from the same two sewn-together strips of fabric.

Bee blocks for Laurina

Bee blocks for Linda Now on to Shelly's, Mel's and Karyn's!

02 November, 2012

Glenys' bee block

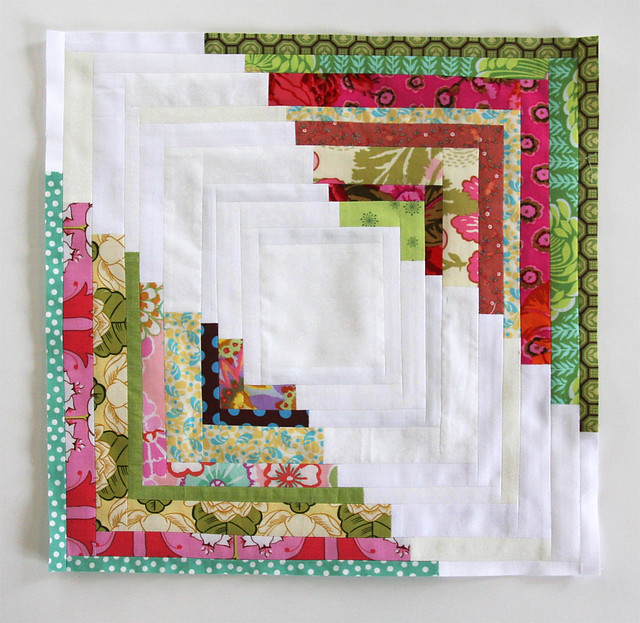
Glenys wanted us to do a Converging Corners block for her, and gave us all an assortment of coloured and white scraps.

The concept of converging corners is pretty simple, you just build up the block with strips which are part white and part colour, putting the colours in the corners where they form a V. When they're all put together they produce these multi-coloured starbursts across the quilt. I was quite excited when she told us what we were going to be doing because I've loved the pattern since I first saw it.

The block is 15 1/2" square, which is a fair few strips as I discovered! I don't know if there is any way to judge how much you should extend each strip past each other to get the best effect, I sort of feel like I was too conservative and it doesn't have that really dramatic zigzag effect of the original. I think I could also have gone with bigger strips given the size of the overall block. I think wider strips would automatically allow you to have larger steps between strips. But I'm generally pretty happy with how it turned out and I can't wait to see everyone's together! I had to add in a few of my own scraps because you actually need quite long strips by the end and I'd used up the longest ones too early.  Live and learn, which is why bee blocks are so great - you can practice on some other poor person's quilt ;)

Glenys' block I'm now caught up with bee blocks and can turn my attention to my stuff - and Christmas!

29 October, 2012

Giveaway reminder and Megan's squares

Just a reminder about the Little Craft Store giveaway that I'll be drawing tomorrow - pop over here to put your name into the draw!

At our last Monday Modern meeting we had two people come with their bee blocks so I'm going to try and get them both done before the next meeting on the 5th. Unfortunately I can't go because Mat's working out of town for most of this month and I have a feeling that leaving your seven year old sleeping in a house by herself is frowned on by society. It's also Guy Fawkes so it probably works out well that I'm home to let off fireworks if we haven't done it on Sunday night instead (I hate having to do these things on the wrong day if they fall on a school night, totally sucks the fun out of them!).

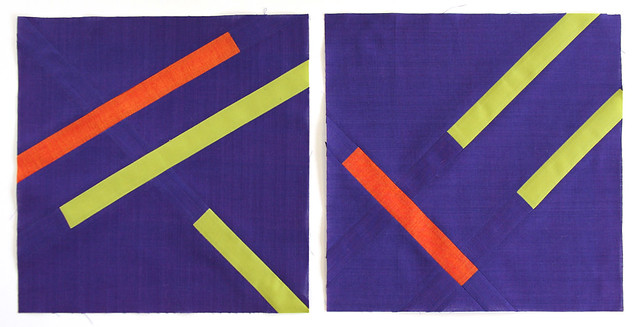
Anyways! I've just finished Megan's blocks and I thought she might like to see them. She's asked us to make blocks for a quilt something like Red Pepper Quilt's 'Slice and Dice' pattern. The fabrics are all shot cottons, although the green looks for all the world like silk, it even has that lovely sheen to it. They're more subtle in real life, the photo has made them look a bit neon. At first I was rather intimidated by the concept of these blocks but once I started thinking about placement and the order of things it was much less scary, and quite simple in the end. Even sewing on the bias without the walking foot didn't seem to present much of a problem as long as I kept that piece against the feed dogs and the on-the-grain strips on top.

Megan's squares They look kind of matchy don't they. I really didn't intend them to come out that way, I thought I was doing two quite different blocks but when I was 3/4 of the way through the second block I looked at them both and had a total d'oh! moment because they're almost identical. I mean, usually when I think I've been innovative with something and discover that someone's already done it, it's a stranger, not me! Just stick them at opposite ends of the quilt Megan, and no-one will ever notice! :P

21 September, 2012

The lazy woman's guide to making wonky stars

I like efficiency. I like finding a better, quicker, easier way to do anything. And really all that boils down to the fact that I'm, at heart, a very lazy person. If I can expend less energy getting from A to B then I'm all for it. So when I read instructions for wonky stars that want me to cut out lots of squares from various fabrics for the star points then my immediate thought is "do I really have to?". And no, it's not necessary, any old scrap will do if it's big enough as many other tutorials will tell you. But then I had issues with sewing on scraps and they wouldn't fit because I'd estimated wrong - unpicking the seam is time I could spend playing on the internet or with my iPhone, so that was just unacceptable. I also didn't like the wastage involved with some methods I've seen online. Fabric is expensive here in NZ, I'm not throwing away more than I need to. Lazy and cheap - that's me! So I started doing it this way. I'm sure I'm not the only person who does it this way, nor the first to document it, but I thought if it helped just one person spend more time on Instagram I would be doing the world a favour. This isn't a proper tutorial on doing a wonky star, just on making the sections. If you'd like to try making one I really like this tutorial at Oh Fransson!, although you have to add in the extra corner squares if you aren't joining them all together like she does.

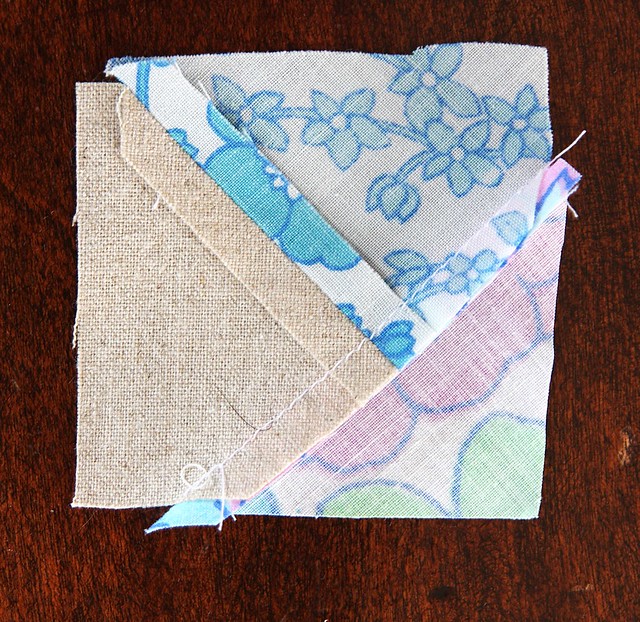
The thing I like about doing it this way is that it doesn't matter if you have a small scrap or a large one, and if it's large you can just work in from the edge as you make stars and you don't waste as much as you would if you precut bits. Admittedly, I wasn't quite as careful with the first fabric in this tutorial as I would normally be, but hopefully you get the picture!

Untitled


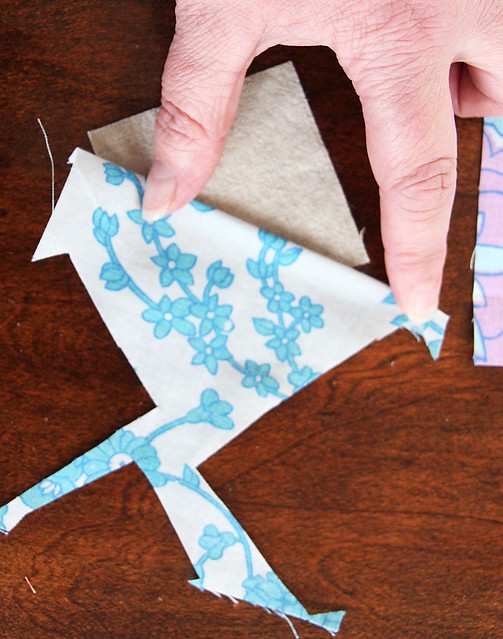
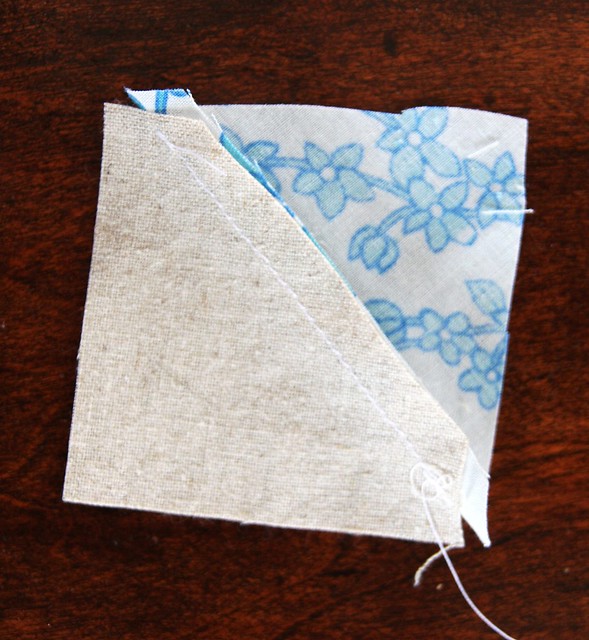
Select your first piece of fabric and fold over the edge about 1/4". It doesn't have to be exact but it does need to be even (please excuse the out-of-focus photos, the camera decided to focus on my wrinkly old hands instead). I finger crease it slightly.

Untitled


Then flip it over and figure out where you want it on your square.

IMG_0919
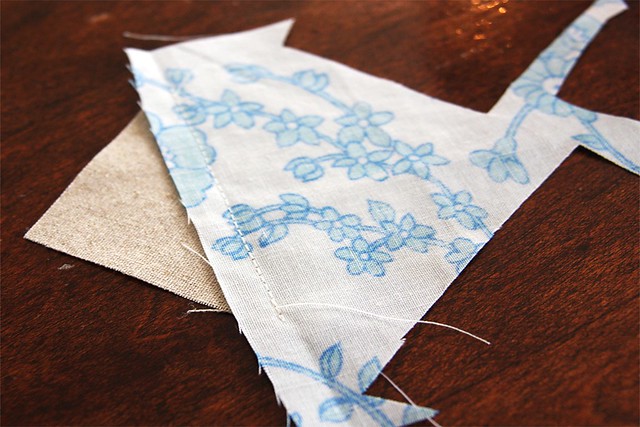
Once you have it where you want it, carefully flip it over and sew along the crease line. I usually just wiggle a couple finger tips under to grab the edge and keep it in place while flipping.

Untitled


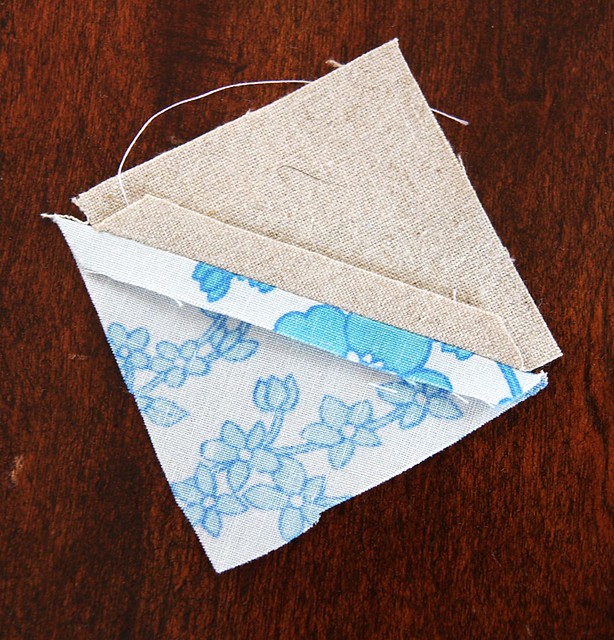
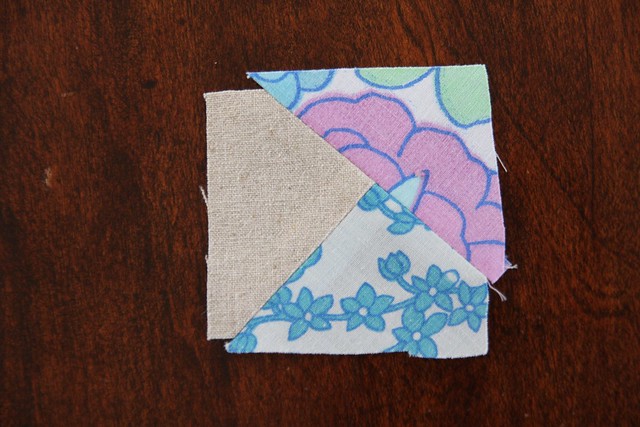
I then open the fabric out and flip it over so I can see the background square. If you can't see fabric all around the background square then you'll need to unpick the seam and try again.

IMG_0923


I trim around this to get rid of the excess, leaving a little extra just in case (I forgot and trimmed off the corner before I cut around it, don't be like me! I've Photoshopped it back together, if only we could do that in real life...). 

IMG_0925

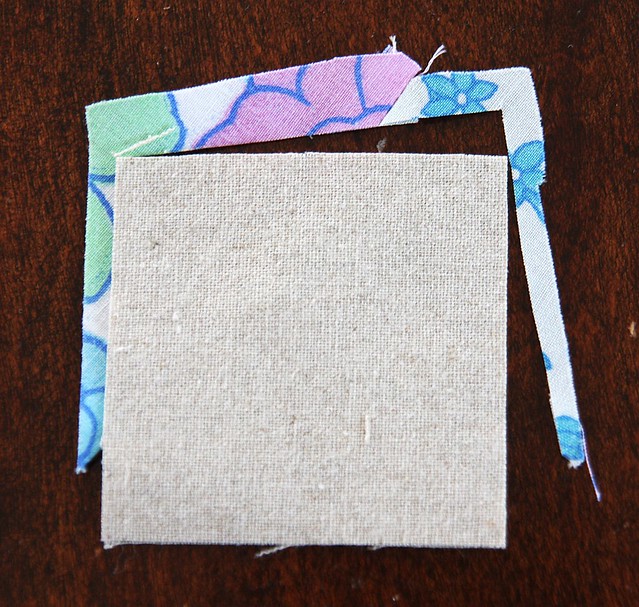
Then trim off the excess background square. To be honest I don't really see the point in worrying whether this is 1/4" or not - who's going to see it? As long as it's wide enough things don't fray through and it's fairly even I call it good enough.

IMG_0926

I usually press open my seam with the iron at this point, although you certainly don't have to and can just finger press, I just think it means less distortion and the square will sit flatter in the end.

IMG_0927

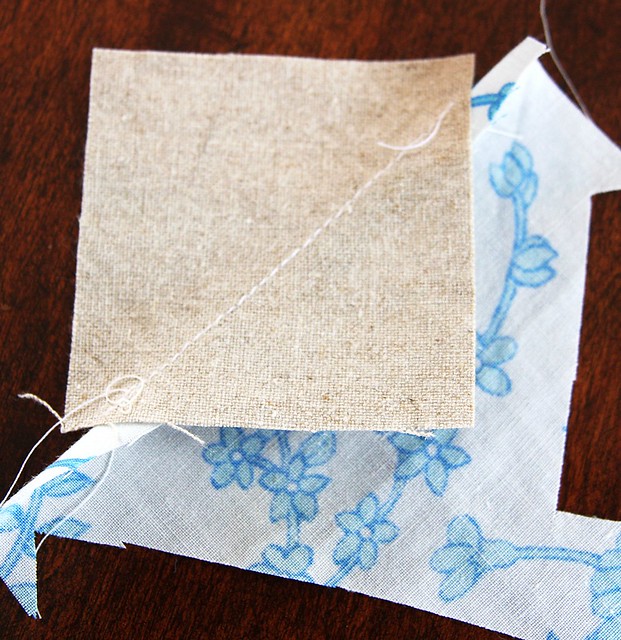
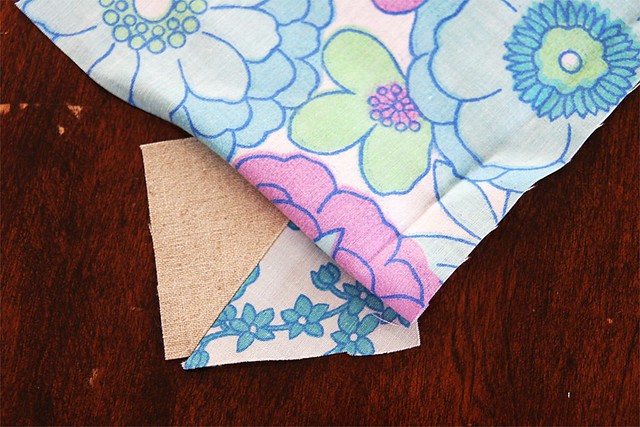
Now repeat with the second fabric. Position it on the square with the edge folded over

Untitled


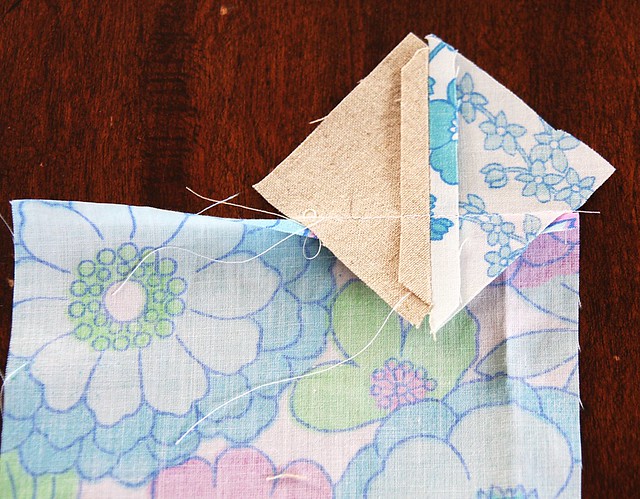
Flip, and sew down the crease.

IMG_0929


Open up the fabric and trim around the corner. Oh look, cat fur is stuck in the seam! Typical.

IMG_0930

The corner will be a bit wonky from adding the first fabric but as long as you allow a smidge extra you won't get caught short when you open it out, which I know from experience is a seriously curse-worthy moment!

IMG_0931

And then trim off the excess corner and press open the seam

Now the square needs to be trimmed.

Untitled


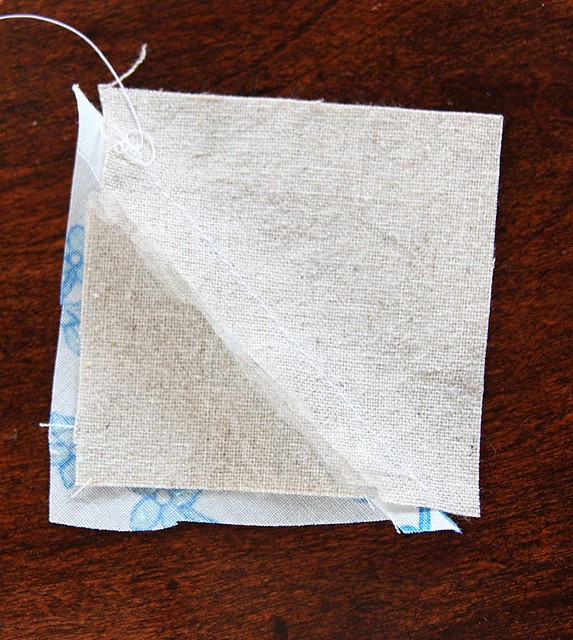
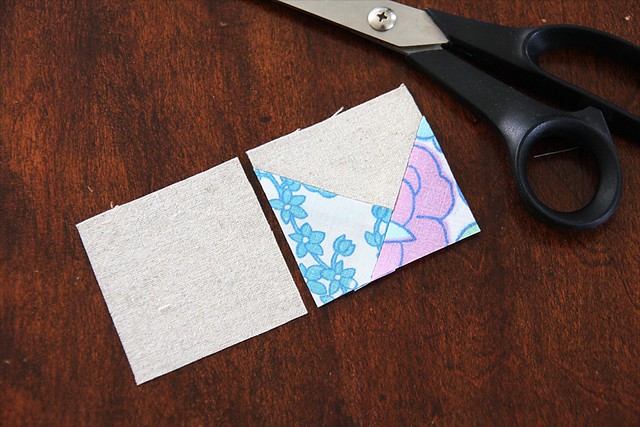
Why pfaff around with a cutting mat when you have a perfect square of just the right size sitting next to you - just grab one of the unused background squares, position it over the top and trim around it carefully. I find this is a great way to square things up again if they've become a bit distorted by the sewing and pressing and much easier to do with another square than to try and figure out on a cutting board.

IMG_0934

 Et voila! A perfect little square all ready to go.
Untitled

05 September, 2012

Wonky star bee blocks

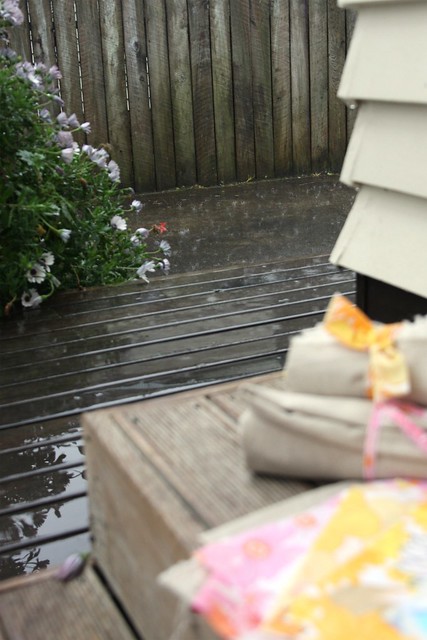
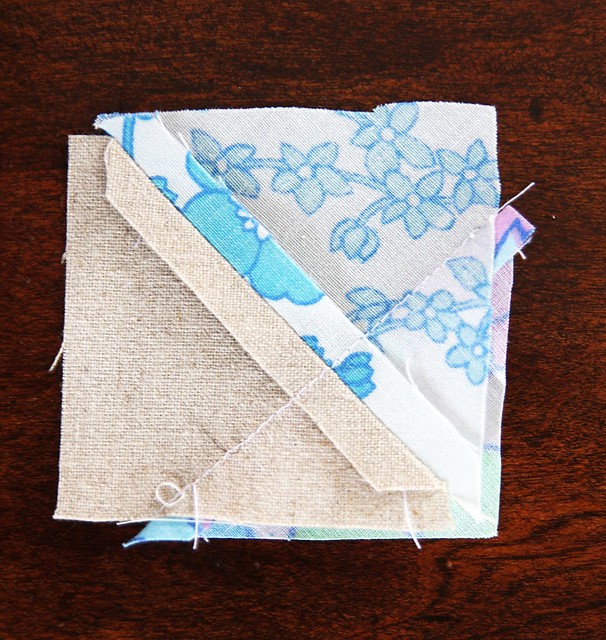
For my Monday Modern group bee blocks I'm asking everyone to make me wonky stars using linen and vintage sheets. Everyone got a small bundle with an assortment of pink, blue, yellow and 'white' sheet scraps. The white are actually prints that have a lot of white background and soft colours, and I've included some solid white fabric just to make it more obvious.
Untitled

 I'm really very excited about this bee! I had to laugh at myself a bit though, while taking this bright and happy photo because look what it was doing just out of frame...


Untitled

 ...just bucketing down! In fact, by the time I took the top photo it was raining so hard that it was bouncing up off the deck (which is covered all the way to the steps out there btw) and getting on the fabric - if you look hard at the pink on the left you can see the raindrops.

31 August, 2012

Bee blocks

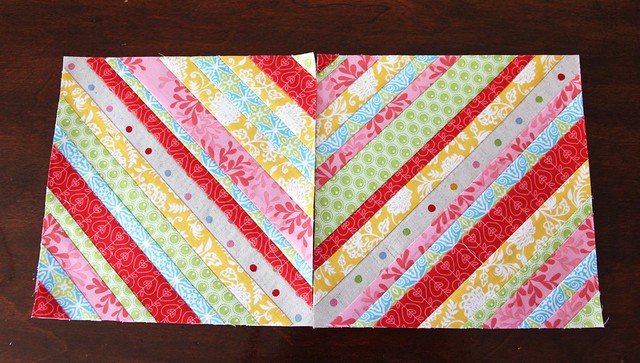
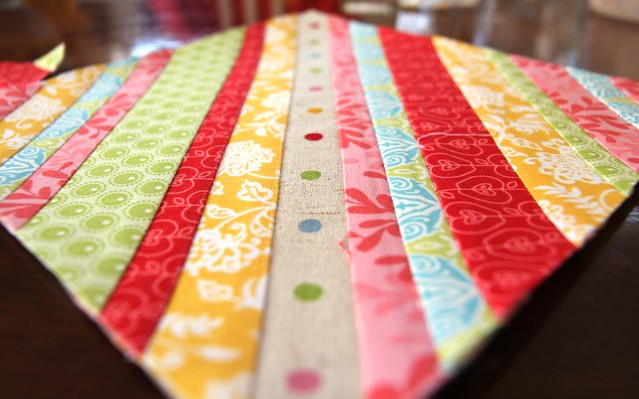
My Monday Modern group has decided to do a bee, and Helen was the first person to get herself organised and the fabric distributed. She's doing a quilt that's a combination of string-pieced blocks and hexagons. She asked the group to do the string pieced blocks and provided us with a central strip of spotted linen and five other fabrics for the rest of the strings. Seeing as we meet this coming Monday I figured I should get it done so I can spend some time getting my block fabrics sorted to take along!

Foundation pieced string block for Helen

I've never done a string block, but as this one uses a paper foundation it promised to be fairly easy. And actually it was, but only by the skin of my teeth because I literally had a small handful of tiny scraps left over at the end! I think that's a combination of Helen's good estimating and my profligacy with the way I put the first block together. At first I was centering the fabric strips without much thought for how much was hanging over the edges to be trimmed. I realised fairly quickly that I should be placing the end of the strip just a bit further than it needed to be, and saving the excess at the other end for the shorter runs. I knew I had some of the pink she is using so I could have cut a strip of that, but in the end it was just enough. I was quite proud of myself!

Foundation pieced string block for Helen

 The one thing I did stuff up a bit was in drawing the 8 1/2" square of lunch paper I used for the blocks, one side was about 2mm under (whatever that is in inches), consequently a couple of strips are a smidge on the short side and the centre strip isn't exactly centre, but I'm pretty sure that will be absorbed in the seam allowance and all will be fine.

I love how cheerful and bright the blocks are without being too busy - and boy are they fast to sew up! If only I had more scraps...

24 July, 2012

Polaroid mini-quilt WIP

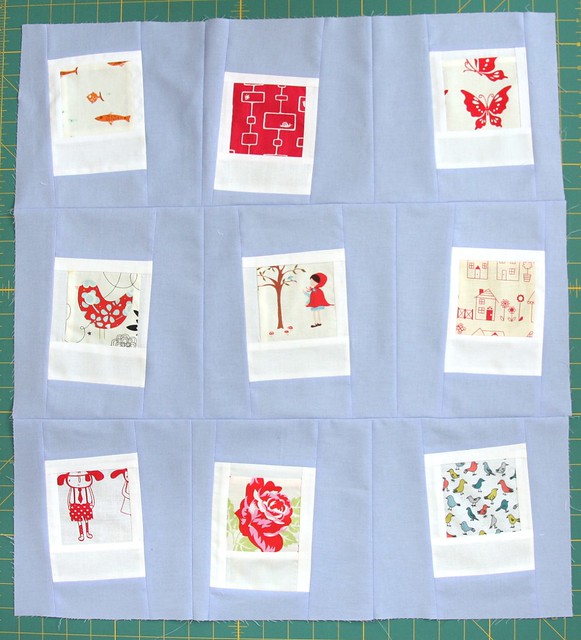
Our most recent homework for the Monday night quilt group was to make up polaroids for little quilts. We pooled them all and sorted them into groups of nine based on colour and then we all took a batch home to turn into a quilt. I scored with the reds. It's been a lot of fun putting it together, although I'm a bit stumped with how to do the quilting - suggestions welcomed!

Untitled

I changed the proportions of the polaroids so they have thinner tops and sides. I almost ruined them though, by trying to take a short cut and trim several down at the same time in a stack. Oh boy, SO not a good idea! The bumps caused by so many seams one on top of the other meant the rotary cutter wouldn't go through them properly, which caused several to skew and when I stopped to see how they were going it looked like some wild animal had been savaging them along the edges, and many of the borders were cut on an angle. Despair! Rending of hair and cursing of stupidity! Luckily, there was enough on all of them to create a straight edge with the blue sashing and I actually like the thin borders I ended up with. It wasn't very good for my blood pressure though.

I used blue strips of various widths for the sashing, ranging from 3-1.5cm. I'd say the 3cm gave the most flexibility in terms of placement and wonkiness, but having wide on one side and thinner on the other was also quite useful for breaking up the tendency for each polaroid to line up with the others. Thin-thin didn't work. I ended up laying them all out on the cutting mat, making sure the edges of each row extended over some arbitrary line, and then I cut along those lines. This meant all the blocks matched perfectly, although they're not all the same size. I think there are pros and cons to doing it this way. On the plus side all the blocks match up and sewing them together was a breeze. I also like that the seams are scattered about to a degree so it's not too grid-like. On the other hand, it is slightly random-looking and there are seams everywhere!

I used Kona for the solid blue and I have to say it's really not the nicest fabric. Sure there are bazillions of colours and all that, but the weave is so coarse and cheap-looking it's quite off-putting. I need to try some different manufacturers I think. Spotlight's solids have a very nice hand and come in a decent enough range of colours, but I've found if you iron them repeatedly across a point where the seam is quite thick the fabric wears quickly and the colour fades so I'm not sure what their lasting power is.

ETA: Thanks for all the comments about solids. If anyone is interested in the various types around Little Miss Shabby has a great run-down here.

28 June, 2012

Star block

Untitled

The other night Cat was telling me a sad tale of a friend of hers in London who signed up for a bee with 18 people, and dutifully made everyone else's blocks, but when it came to her turn she got blocks from 3 other people. That is just tragic, but I'm assuming not uncommon? Anyways, Cat mentioned that she was collecting blocks from nice people to send over to her, and since she wanted stars and I was finishing up my blocks for the AMQG raffle quilt I made one. While the AMQG blocks are a small 9.5", this one is a nice generous 12.5" and SO much more fun to make for that reason! Took awhile though, those little stars are fiddly! The block comes from the Modern Blocks book. I had an awful time getting the final few seams to sit straight and even now I can see a few wobbles and mismatched seams.

I finally figured out why my point blocks are sometimes wider at the base than at the points - it's the bias stretching out in some fabrics. Phew. I was really beginning to worry about my seam allowances! I managed to keep a handle on it on the whole, though I can see one spot where it's not great. Any suggestions on how to avoid this?


19 May, 2012

Brown Hexagons

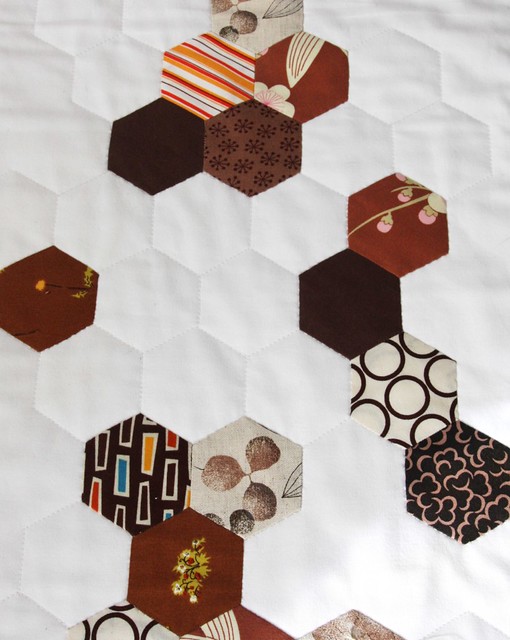
I mentioned awhile back that I'd done a 'block you don't like in a colour you don't like' challenge for my Monday night modern quilt group. I decided to do hexagons because I really haven't felt the love for them at all, popular as they are; and I chose brown because although I don't mind it as a colour, I really don't like it in quilts. Brown hexagons. Blech. This is what I ended up with

Untitled

Although it wasn't explicitly stated, I think part of the reason we chose this challenge was to see if we could come to like something we might be prejudiced against for whatever reason. Now, I'm not entirely sure why I don't like hexagons much to be honest, I just don't. Someone suggested they might be too geometric, or precise and I think that's probably it in some deep subconscious way.

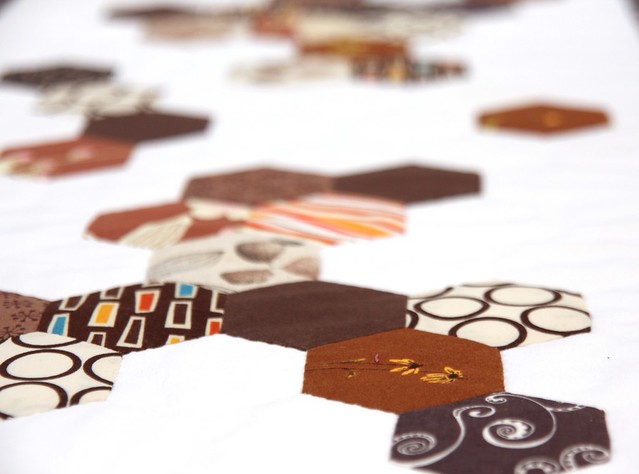
Brown, well I don't like brown in textiles much because I grew up in the 70s. Add some orange to that and you've got every childhood trauma right there. So of course I had to add in some orange. It didn't matter that it was Heather Ross orange either, because oh my I do not like this colour combination! Mat suggested after it was too late that green would have been a good background, and then I thought perhaps a paleish blue might have been good too, but it was too late and I'd already done all the quilting so wasn't going to change it. But I think perhaps it would soften the starkness of the brown against the white. I really need to stop using so much white as backgrounds.

So what do I like? Well I really like how I put the hexagons on (barring a few layout issues I can see now) with the negative space. And I really like how I quilted it.

Untitled

Basically I quilted on the hexagon shapes first, then appliqued the hexagons on. I left parts of the top unquilted, so both the quilting and the actual hexagons have a lot of empty spaces. In fact, I could happily take off the hexagons and just have the quilting! I also really enjoyed making the hexagons, it was satisfying and good for keeping hands busy while watching tv.

Verdict: I still don't like brown much, but I think it's possible that, used judiciously, I could come around the hexagons. Just not brown ones.

Untitled

LinkWithin

Related Posts with Thumbnails