25 December, 2012
Merry Christmas!
Merry Christmas to you all! It's a humid and rather unpleasant day here in Auckland as we catch the tail of ex-cyclone Evan, but Santa made it here fine despite the weather and we're having a very quiet day with just the three of us. I hope wherever you are, whether its Christmas Day or Christmas Eve, that you enjoy it thoroughly!
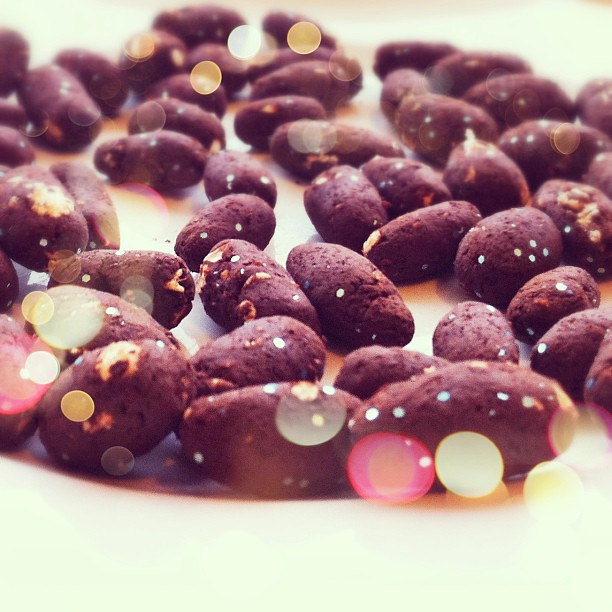
One of the things Santa, or should I say the reindeer, left behind was a little deposit near the reindeer food, carrots and water we put out on the deck. Apparently reindeer eat cocoa, coffee grounds, our reindeer food (oats and glitter), a few drops of oil and some water.
Hazel: They're real reindeer poo!
Me: How do you know?
Hazel: I poked them with the end of the old broom stick. Don't touch it, it's covered in poo.
The things we do to keep the dream alive eh?
19 December, 2012
The Math Facts Quilt
Phew! Done in the nick of time - last day of school tomorrow and I handed it over this afternoon. It's been awful weather for even standing next to a quilt, very hot and humid, and even more so when I gave it to her teacher, but it'll come in handy in the winter I'm sure!
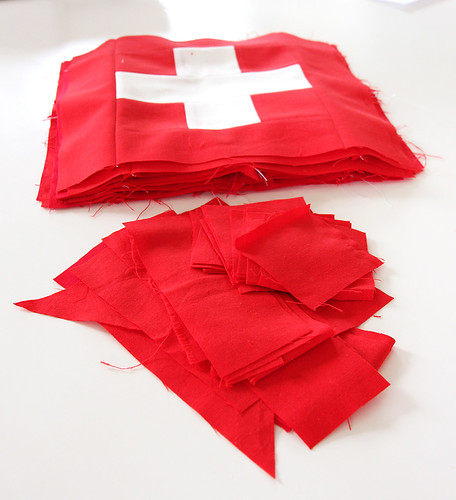
The pattern is by Crazy Mom Quilts, but I added in the minus and division signs (forgot equal until it was too late!) and it's a bit smaller than the pattern calls for, more lap-sized. Although you can't really tell from this photo, there are four different reds used in the quilt which gives it a nice mottled look. The differences are more subtle than in the pattern example, and they're all solids. Two I already had in my stash and two are Moda Bella - Betty's Red and ummm... (Helen, help! what was the other one?)
The back is a very cute blue gingham, and it's bound with a larger red gingham by Riley Blake, both from The Little Craft Store. They definitely saved it from looking too Christmassy - a natural hazard for anything red and white at this time of the year!
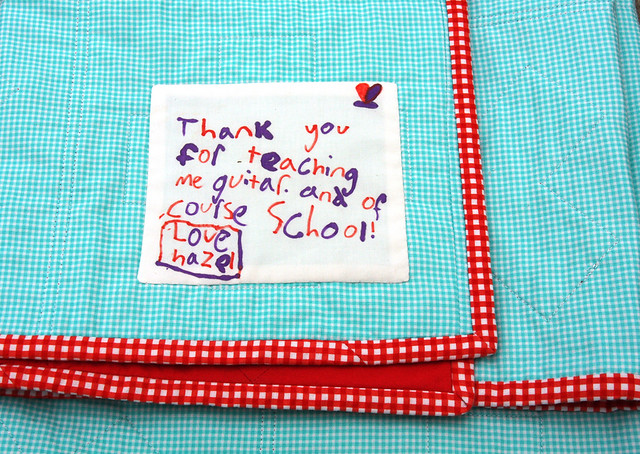
Hazel did the dedication to her teacher in fabric pens, I think it's sweet - love how she mentioned guitar first rather than two years of being her teacher! She's had Ms. N. for two years and is moving on to a new teacher next year, again for two years. It's a wrench for all of us because Ms. N is a delightful, inspiring and genuinely all-round very cool teacher and I know that Hazel has been lucky to have her. She's getting married over the summer too, so this quilt is also part wedding present.
The null set square came out well too

It didn't all go smoothly though, mainly because my walking foot seemingly stopped working after about four lines of quilting. It's been a bit dodgy since one of the plastic prongs that hold it on to the foot post broke, but it started slipping off and so I gave it up and went on with the regular foot. Big mistake! I didn't realise until I was done that despite my best efforts it was pushing the top around and I ended up with wrinkles and a bit of distortion. I tried the walking foot again for the binding and of course it was fine! Oh well. It's not too awful on the whole, and it definitely doesn't look as bad as the photos suggest!
16 December, 2012
Is this now a crochet blog?
No, no it's not but it does seem to be all I blog about at the moment! I'm sure that will change at some point but at the moment it's all I have to blog about :)
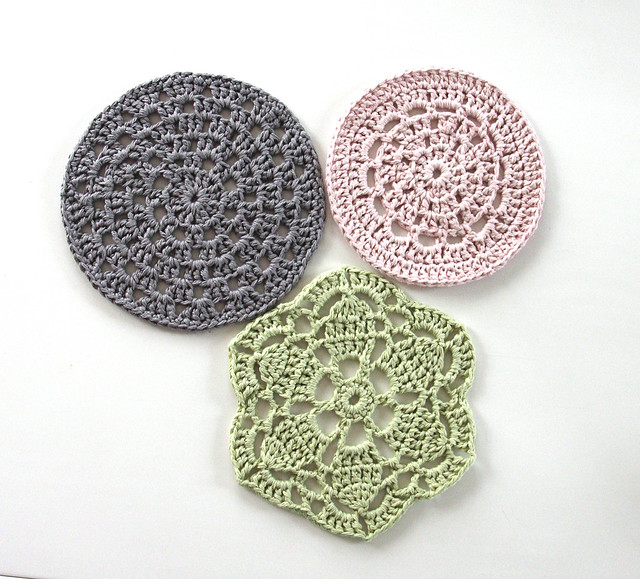
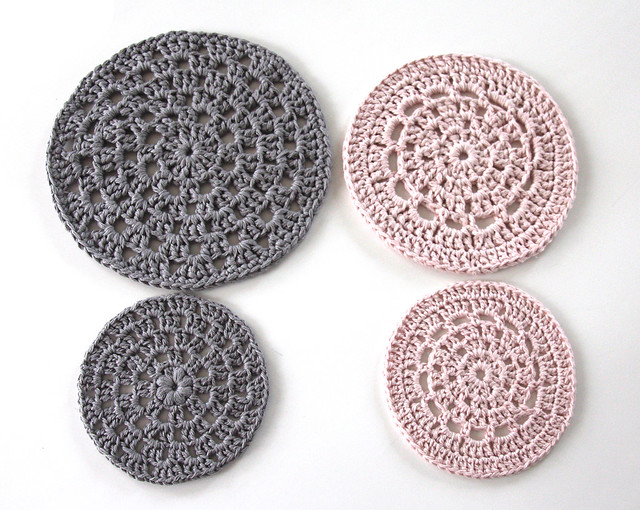
So what am I crocheting at the moment? Coasters and table mats, or place mats or pot thingies or trivets or whatever they are called, I'm not sure. I got the pattern from one of the three great crochet books I have out from the library - Simple Crocheting (or Simple Crochet or Crochet Workshop as it's also known by - why three different titles?!) by Erika Knight. The other two are Creative Makers: Simple Crochet and Knot's Itoami Plants, which I'll hopefully get around to saying something about soon. Anyways, I'm really enjoying Simple Crocheting and will definitely be getting it for myself, it has a great assortment of actually useful projects and was quite popular at knitting/crochet group last week when I took it along.
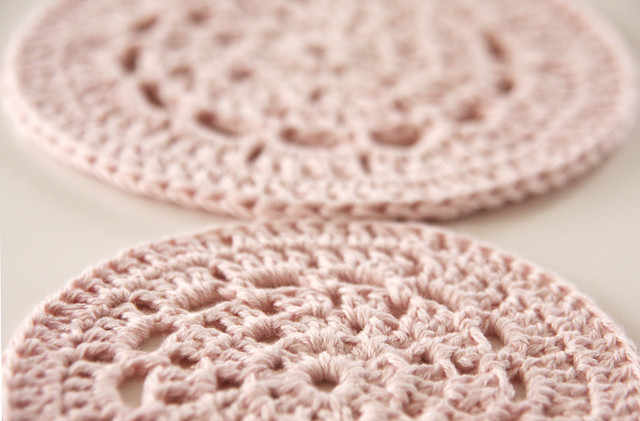
They're done in cotton yarn and there are three motifs to do all up. This is the first time I've used cotton and it's just some cheapy stuff I picked up from Spotlight so I suspect possibly not the easiest stuff to work with. Much less forgiving than wool, but I love how defined the pattern looks with it. I have to say I had some problems with the patterns, I ended up having to improvise several times and change things around to get them to work. I don't know if that's me as a beginner or the patterns themselves or what. For example I had to remove one chain between clusters on the last round of the grey one because it wasn't laying flat. I didn't do one round on the pink because it just didn't sit nicely - but they both look fine in the book's examples. Maybe it's the yarn? I also really struggled with the way the patterns started new rounds, it just seemed to be really awkward and I was left with ugly thick bits and wonky-looking areas. It also does a lot of stitches into the top of dc (or tc in British terms) which I found almost impossible to get to look nice. In the end I tried to work into chain spaces where I could and slip stitched into spaces to start and it just went more smoothly. Is that a style thing maybe? I suspect my lack of experience. Anyways, the result is worth any minor quibbles! And thank god for You Tube when it came time for the dc5tog on the green ice crystal, there's nothing in the book about how to do it, but just google your problem and some nice and talented person has made a video for you that solves everything.
Funnily, I had done a couple before I realised I was supposed to be doing them with the yarn doubled, so I ended up with big and small versions! The big grey one is about 18cm across and the little one is 11cm.
It's a totally different effect with doubled yarn. The little coasters are delicate and sweet, the thicker ones lose the pattern a bit, but have a nice solidity to them, the pink begonia wheel especially (that's my favourite pattern by far). I tried repeatedly to make puff stitches in the first round of the big grey wagon wheel as per the pattern, but just couldn't make anything that looked halfway decent. There weren't actually any directions for puff stitches in the pattern, so I went from a puff stitch in another project, which was fine in the single yarn, and when that didn't work for the double I tried less loops until I just gave up and did dc clusters instead. Again, yarn maybe? I'm going to get some good cotton and make some more over the holidays.
I'm looking forward to trying a few more projects from the book because they really are lovely, although I'm not 100% confident that I won't run in to pattern issues like I did with this one. Still, if it comes out in the end you can't complain too much can you?
02 December, 2012
Crocheted snowflakes
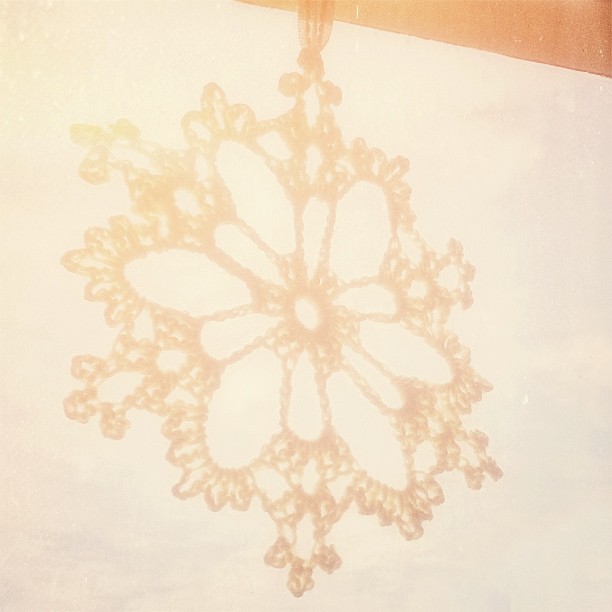
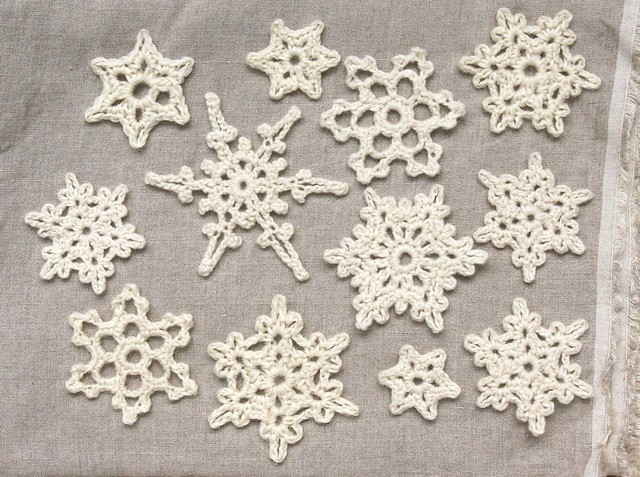
I think I'm kind of addicted to making these! I've spent quite a lot of time trolling Ravelry and Pinterest for various patterns, and I know I've only skimmed the surface! I really need to get one of those '1001 Snowflakes to Crochet' kind of books, but of course they're all out of the library at this time of the year.
I've been experimenting with different hook sizes and with two different yarns - both 8-ply but one is slightly felted and I think it shows off the patterns slightly better, but they're both fine.
The most common one up there is from Attic24's wonderful tutorial - if you haven't made snowflakes before I highly recommend starting with that one and it gives you all the skills you need to move on to other variations. They're really quite simple once you get going. I've stiffened them with a mixture of PVA glue and water, directions are here. My solution was probably more like 70/30 water and PVA than 50/50 though, I didn't want them to be too stiff.
Other patterns I've used are:
My favorite snowflake
Snowflake ornament at Redheart
Drops Snow Stars
Quick Picot Snowflake (also available as a free class from Craftsy)
Not pictured is Meet Met At Mike's stars which I tried last night - quite a different technique and look than these ones (not surprisingly considering they're stars!), but still fun.
Labels:
Christmas,
Christmas 2012,
crochet,
ornament,
snowflakes
28 November, 2012
Null set
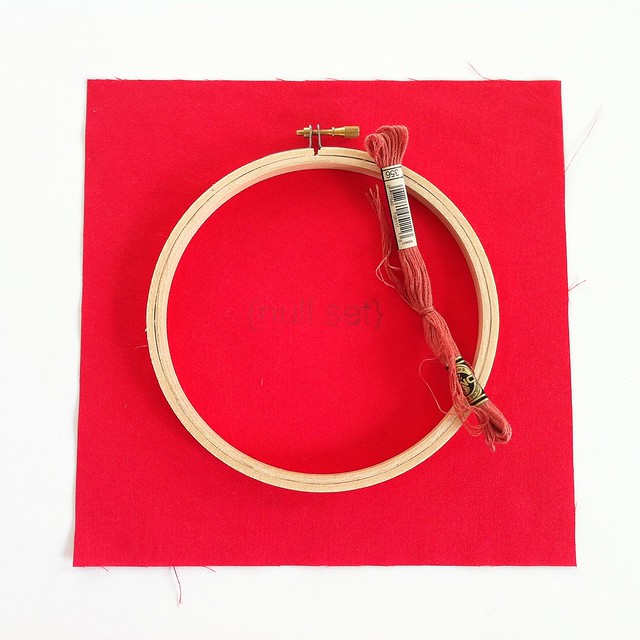
It's been a bit like that on the blog lately hasn't it! This is an empty block I'm going to embroider {null set} on for the math quilt I'm making - it was Mat's idea and I was mostly just humouring him with it at first, but I'm kind of taken with it now! The embroidery is my idea though, just to make the joke a bit more obvious ;) The font is Helvetica. Mostly I've been beavering away on the quilt, girding my loins in order to make myself some clothes, and crocheting away like mad on a few secret projects and a lot of snowflakes. Must get some photos of those, they're kind of cool! I'm trying to beat the Xmas mailing deadlines so I can get all the gifts off to Canada and the States. My parents are heading to New York to spend Christmas with my brother and his wife, the lucky things! Christmas in NY is high on my bucket list. I think the closest I'll get in the near future is summer in Edmonton, but actually that's kind of ok too :) Ummm...what else. Not much really! Hopefully once the other presents are sent off I'll have a chance to work on my clothes and do a bit more relaxing stuff I can blog about :)
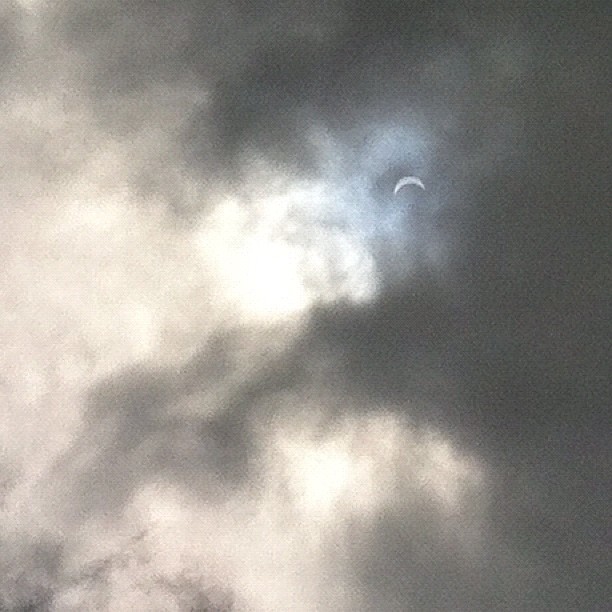
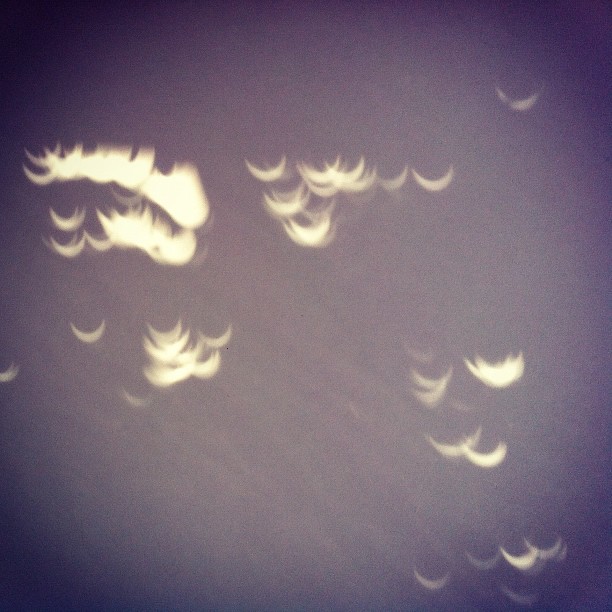
I promised my dad that I'd put up some photos of the partial eclipse we had a couple weeks ago. It was a lot of fun watching it via a pinhole in a piece of cardboard - surprisingly effective for such a basic setup! I think we had about 60-odd% coverage here in Auckland and even just with that the light went all strange. I remember seeing a full one when I was a kid, I hope that wasn't the only chance I'll get in my life!
I also tried taking a photo straight in to the sun in order to get a lens flare - look at the little eclipse it shows!
Eclipse shadows - quite by accident I put the pieces of viewing card down where the sun was shining through some jasmine leaves and noticed that the pinhole effect of the sun shining through the gaps in the leaves was showing the eclipse naturally!
I feel a bit stupid admitting this, but I'd never realised that circles in things like lens flares and light shining through leaves are there because the sun is round. See, old dogs can learn new tricks!
12 November, 2012
Geometry fail
I'm almost half way through making up blocks for my Math Facts quilt; but I'd be further along if I hadn't had a massive fabric cutting fail yesterday! The bundle in front of the photo are all strips and blocks that I'd cut, which I couldn't use because I'd cut way too many of them and then wasn't able to cut some larger pieces required for the X blocks. I am now down 3 X blocks in the scheme of things. I am really ticked off at myself for two reasons - firstly it's a big fat waste of fabric and secondly, I feel like a doofus. I'm all about efficiency and getting things out of the least amount of fabric possible and this is a blow to my self-esteem! I'll probably use up the scraps in something or other eventually but honestly! Doofus.
Do any of you know if there is some sort of rule of thumb when it comes to cutting fabric when the pattern doesn't give you a cutting order, just the total of all the pieces? Should I have cut the bigger ones first? How do you judge how many blocks you're going to get without sitting down and basically drawing it all out before you start? I want to balance caution with economy of scale.
11 November, 2012
A civil war bullet
The most popular artefact from my archaeology talk the other day was this American Civil War lead bullet. My friend Shelly's husband found it along the Appalachian Trail in Harper's Ferry. It's in perfect condition, although it has a white oxidised (or whatever lead does) layer on the surface. All the history of the Civil War, and of Harper's Ferry, aside, the thing that most strikes people is how heavy it is. Certainly the kids had no idea about its context, but they loved how it feels in the palm of your hand. The bullet also reminds me of Harper's Ferry, which I enjoyed visiting enormously, and of course Shelly - so its story continues even though it has fulfilled its original function!
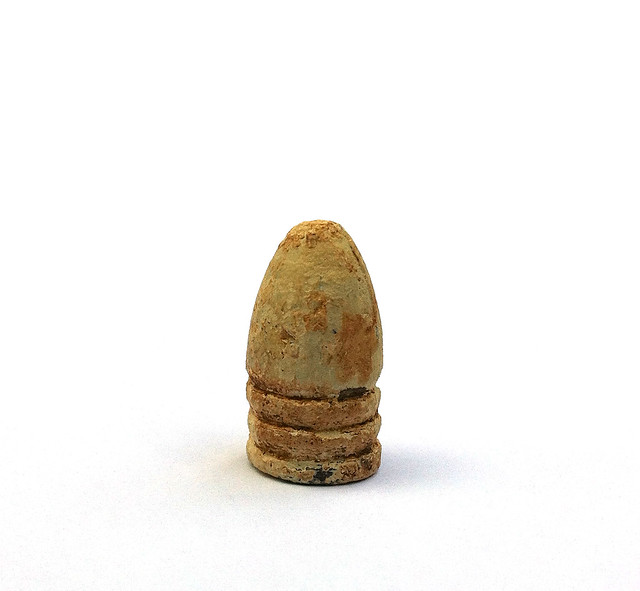
A little online research just now suggests it's a .54 caliber 3-ring Minie (or Minié) ball, very common, used by both sides.

A little online research just now suggests it's a .54 caliber 3-ring Minie (or Minié) ball, very common, used by both sides.
09 November, 2012
You know, stuff.
Not much happening in my world at the moment, a little crochet, a little sewing, a little wasting time on the couch with my iPhone. Not much to report! I haven't finished anything but I've started a few things - another crochet bunny (one of three for Xmas presents), a thank-you quilt for Hazel's teacher for the end of the year, a dress for me and there would have been a tshirt except I discovered I don't have quite enough of any of my knits to start it. Does your stash ever let you down like that? Masses of fabric but not enough to actually DO anything with. I'm not sure if it's bad planning or just one of those Murphy's Law things.
Today I went and talked about archaeology with Hazel's class. The junior school is focusing on science this term, so I volunteered to come and talk about my science. I don't often consider myself one, but I suppose technically I am and I'm certainly a fervent believer in the process and ethos of science. I took in a few bits and bobs that we've accumulated over the years, not entirely sure what they'd make of them. Archaeologists aren't really meant to have collections per se (leaves us too open to nicking things from sites) but most of us end up with an accumulation of things that are out of context on sites, or are random finds outside of proper excavations. The kids were pretty taken with some of the things and it made me look at them with new appreciation again - so I thought I'd take some photos over the next few days to share on Instagram and here.

This is a collection of little bits and pieces that usually sit in a small bowl on the windowsill collecting dust. None of them are valuable but they all tell a tale of some sort about the people that owned them. I like that they range from some Roman pottery from England that a friend gave Mat, through old pipe bowls, to coins to lost buttons and a little Eiffel Tower that has "Souvenir de Paris" on the back. And really, that's what archaeology is to me - the stories lost and broken things can tell us about regular people and everyday life in the past. If you want to hear the stories of any of the objects, ask away!
Today I went and talked about archaeology with Hazel's class. The junior school is focusing on science this term, so I volunteered to come and talk about my science. I don't often consider myself one, but I suppose technically I am and I'm certainly a fervent believer in the process and ethos of science. I took in a few bits and bobs that we've accumulated over the years, not entirely sure what they'd make of them. Archaeologists aren't really meant to have collections per se (leaves us too open to nicking things from sites) but most of us end up with an accumulation of things that are out of context on sites, or are random finds outside of proper excavations. The kids were pretty taken with some of the things and it made me look at them with new appreciation again - so I thought I'd take some photos over the next few days to share on Instagram and here.

This is a collection of little bits and pieces that usually sit in a small bowl on the windowsill collecting dust. None of them are valuable but they all tell a tale of some sort about the people that owned them. I like that they range from some Roman pottery from England that a friend gave Mat, through old pipe bowls, to coins to lost buttons and a little Eiffel Tower that has "Souvenir de Paris" on the back. And really, that's what archaeology is to me - the stories lost and broken things can tell us about regular people and everyday life in the past. If you want to hear the stories of any of the objects, ask away!
02 November, 2012
Glenys' bee block
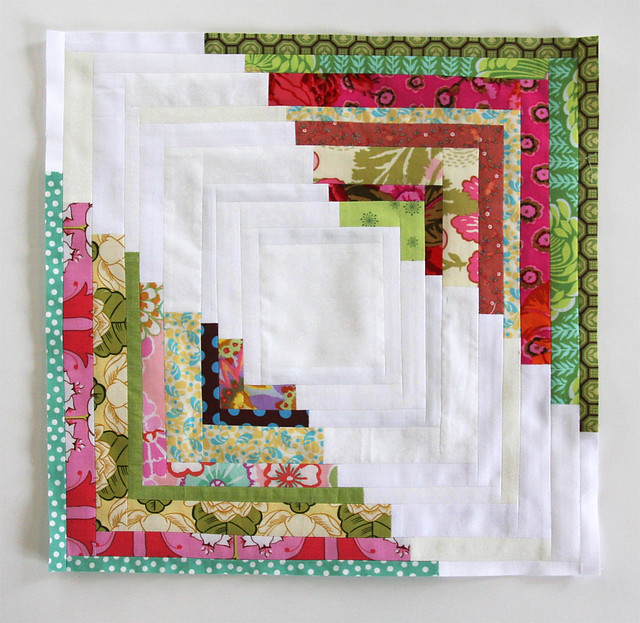
Glenys wanted us to do a Converging Corners block for her, and gave us all an assortment of coloured and white scraps.
The concept of converging corners is pretty simple, you just build up the block with strips which are part white and part colour, putting the colours in the corners where they form a V. When they're all put together they produce these multi-coloured starbursts across the quilt. I was quite excited when she told us what we were going to be doing because I've loved the pattern since I first saw it.
The block is 15 1/2" square, which is a fair few strips as I discovered! I don't know if there is any way to judge how much you should extend each strip past each other to get the best effect, I sort of feel like I was too conservative and it doesn't have that really dramatic zigzag effect of the original. I think I could also have gone with bigger strips given the size of the overall block. I think wider strips would automatically allow you to have larger steps between strips. But I'm generally pretty happy with how it turned out and I can't wait to see everyone's together! I had to add in a few of my own scraps because you actually need quite long strips by the end and I'd used up the longest ones too early. Live and learn, which is why bee blocks are so great - you can practice on some other poor person's quilt ;)
 I'm now caught up with bee blocks and can turn my attention to my stuff - and Christmas!
The concept of converging corners is pretty simple, you just build up the block with strips which are part white and part colour, putting the colours in the corners where they form a V. When they're all put together they produce these multi-coloured starbursts across the quilt. I was quite excited when she told us what we were going to be doing because I've loved the pattern since I first saw it.
The block is 15 1/2" square, which is a fair few strips as I discovered! I don't know if there is any way to judge how much you should extend each strip past each other to get the best effect, I sort of feel like I was too conservative and it doesn't have that really dramatic zigzag effect of the original. I think I could also have gone with bigger strips given the size of the overall block. I think wider strips would automatically allow you to have larger steps between strips. But I'm generally pretty happy with how it turned out and I can't wait to see everyone's together! I had to add in a few of my own scraps because you actually need quite long strips by the end and I'd used up the longest ones too early. Live and learn, which is why bee blocks are so great - you can practice on some other poor person's quilt ;)
 I'm now caught up with bee blocks and can turn my attention to my stuff - and Christmas!
31 October, 2012
Winner!
I forgot to draw the name for the winner of the Little Craft Shop giveaway yesterday so have just done it and the winner was #9 Olga, who said "Chevrons are my favorites. I would make a bag for myself :)" I love the chevrons too! I have to say though, only 13 entries - what do I need to do to give stuff away around here? Perhaps we all have a case of the pre-Christmas blahs. Personally I'm frantically tidying and gathering what Hallowe'en supplies as I can find the day of Hallowe'en in a country that isn't very big on it really. We're having a small after-school party for Hazel's friends so that the mums don't have to take them out trick-or-treating which is not really a goer here despite the fact the kids are very keen - it's broad daylight, 80% of people won't have candy, and 95% of trick-or-treaters make very little effort with the costumes, they just want free candy. Basically it's a massive dud. But parties and special events are much better so I think that's what I'll focus on. I have my costume ready, I just need to get the house ready!
29 October, 2012
Giveaway reminder and Megan's squares
Just a reminder about the Little Craft Store giveaway that I'll be drawing tomorrow - pop over here to put your name into the draw!
At our last Monday Modern meeting we had two people come with their bee blocks so I'm going to try and get them both done before the next meeting on the 5th. Unfortunately I can't go because Mat's working out of town for most of this month and I have a feeling that leaving your seven year old sleeping in a house by herself is frowned on by society. It's also Guy Fawkes so it probably works out well that I'm home to let off fireworks if we haven't done it on Sunday night instead (I hate having to do these things on the wrong day if they fall on a school night, totally sucks the fun out of them!).
Anyways! I've just finished Megan's blocks and I thought she might like to see them. She's asked us to make blocks for a quilt something like Red Pepper Quilt's 'Slice and Dice' pattern. The fabrics are all shot cottons, although the green looks for all the world like silk, it even has that lovely sheen to it. They're more subtle in real life, the photo has made them look a bit neon. At first I was rather intimidated by the concept of these blocks but once I started thinking about placement and the order of things it was much less scary, and quite simple in the end. Even sewing on the bias without the walking foot didn't seem to present much of a problem as long as I kept that piece against the feed dogs and the on-the-grain strips on top.
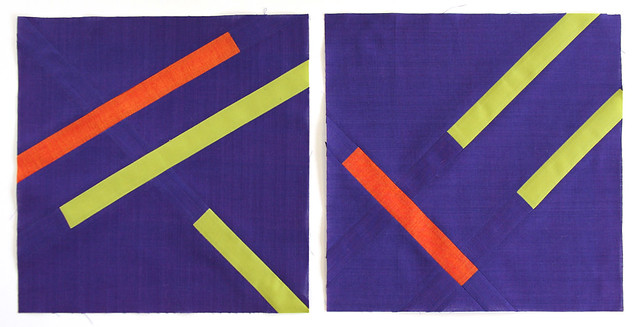 They look kind of matchy don't they. I really didn't intend them to come out that way, I thought I was doing two quite different blocks but when I was 3/4 of the way through the second block I looked at them both and had a total d'oh! moment because they're almost identical. I mean, usually when I think I've been innovative with something and discover that someone's already done it, it's a stranger, not me! Just stick them at opposite ends of the quilt Megan, and no-one will ever notice! :P
At our last Monday Modern meeting we had two people come with their bee blocks so I'm going to try and get them both done before the next meeting on the 5th. Unfortunately I can't go because Mat's working out of town for most of this month and I have a feeling that leaving your seven year old sleeping in a house by herself is frowned on by society. It's also Guy Fawkes so it probably works out well that I'm home to let off fireworks if we haven't done it on Sunday night instead (I hate having to do these things on the wrong day if they fall on a school night, totally sucks the fun out of them!).
Anyways! I've just finished Megan's blocks and I thought she might like to see them. She's asked us to make blocks for a quilt something like Red Pepper Quilt's 'Slice and Dice' pattern. The fabrics are all shot cottons, although the green looks for all the world like silk, it even has that lovely sheen to it. They're more subtle in real life, the photo has made them look a bit neon. At first I was rather intimidated by the concept of these blocks but once I started thinking about placement and the order of things it was much less scary, and quite simple in the end. Even sewing on the bias without the walking foot didn't seem to present much of a problem as long as I kept that piece against the feed dogs and the on-the-grain strips on top.
 They look kind of matchy don't they. I really didn't intend them to come out that way, I thought I was doing two quite different blocks but when I was 3/4 of the way through the second block I looked at them both and had a total d'oh! moment because they're almost identical. I mean, usually when I think I've been innovative with something and discover that someone's already done it, it's a stranger, not me! Just stick them at opposite ends of the quilt Megan, and no-one will ever notice! :P
24 October, 2012
The Little Craft Store giveaway
I've had the button for The Little Craft Store sitting over in my sidebar for awhile now, simply because I loved Helen's shop so much I wanted everyone to know about it. She's gone online-only now and has offered me a giveaway for all you lovely people in order to promote her brand-spanking new website. On offer is a pattern and four fat quarters of Moda Bella Solids. Helen is a genius at picking colours so I know that anything you make from this will be wonderful and chevrons are totally hot right now if Pinterest is any indication!
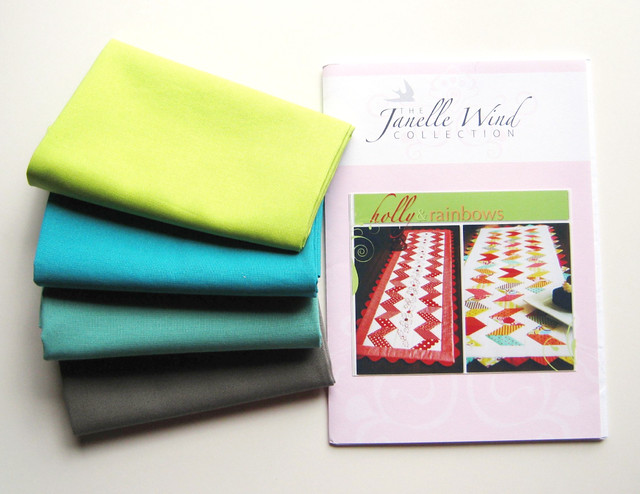
So what do you need to do to get your name in the draw? Head over to The Little Craft Store website and tell me (and Helen) what your favourite fabric is and what you'd like to do with it (hoarding it is a perfectly acceptable answer). I'll use the random number generator to pick a name on Tuesday 30th October NZ time. International entries welcome!

So what do you need to do to get your name in the draw? Head over to The Little Craft Store website and tell me (and Helen) what your favourite fabric is and what you'd like to do with it (hoarding it is a perfectly acceptable answer). I'll use the random number generator to pick a name on Tuesday 30th October NZ time. International entries welcome!
23 October, 2012
The agony and ecstasy of crochet
I have conquered the wallpaper in the kitchen! Unfortunately no rest for the wicked, it's now on to giving the hallway a freshen-up. Sigh. But it's not all endless work on the house and deep (deep) cleaning before it goes on the market, there has been a bit of crafting - mostly crochet as my sewing machine is in being serviced.
I've been working on secret Christmas stuff but I'm going to post intriguing glimpses because I know personally I LOVE it when bloggers get all mysterious and won't show projects and just give hints and write coy little posts. Not. But this isn't a book deal in the offing, this is Christmas, so I hope you understand.
I made this
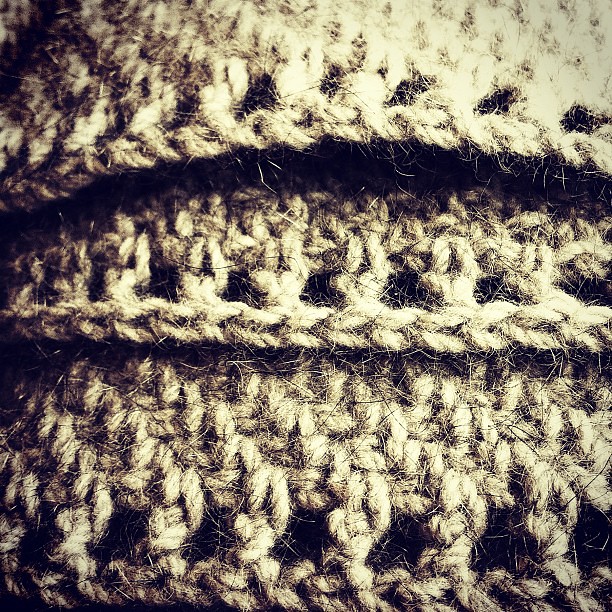
It's in Utiku possum/merino by The Wool Company and it's the kind of yarn you just want to bury your face in and rub it around only that looks really creepy except in the privacy of your own home.
So that was good but this wasn't
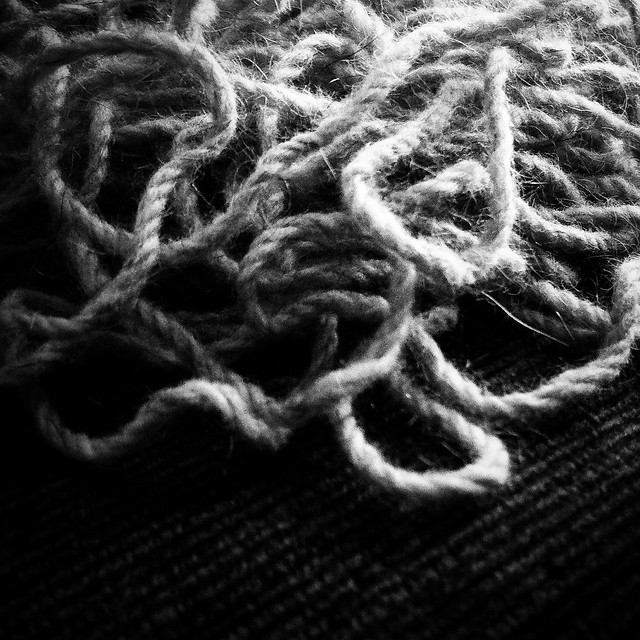
Something else had to be ripped out before the mistake went any further. Amazingly I got it crocheted back up again before the cat noticed it.
I'm missing my Instagram widget in the sidebar, where these images would normally have shown up, but it was causing some people to get a rather unpleasant notification that my site contained malware. Hopefully that's all cleared up now!
I've been working on secret Christmas stuff but I'm going to post intriguing glimpses because I know personally I LOVE it when bloggers get all mysterious and won't show projects and just give hints and write coy little posts. Not. But this isn't a book deal in the offing, this is Christmas, so I hope you understand.
I made this

It's in Utiku possum/merino by The Wool Company and it's the kind of yarn you just want to bury your face in and rub it around only that looks really creepy except in the privacy of your own home.
So that was good but this wasn't

Something else had to be ripped out before the mistake went any further. Amazingly I got it crocheted back up again before the cat noticed it.
I'm missing my Instagram widget in the sidebar, where these images would normally have shown up, but it was causing some people to get a rather unpleasant notification that my site contained malware. Hopefully that's all cleared up now!
16 October, 2012
View from a Village
I'm back! Not that I really went anywhere but I had a small operation, came down with a cold, made it through one week of school holidays and went away for the second. Sounds busy but actually at least two weeks of it involved me feeling sorry for myself and sitting in bed a lot. Now I'm on a drive to get the kitchen wallpapering finished and the hallway spruced up with a coat of paint so we can put the house on the market in a couple weeks. Add in a few handmade Christmas presents and some clothes for me and some for Hazel, including a hat that is needed urgently, and the next month is looking rather busy! I think it'll be ok and even if I can't take proper photos of Christmas presents I can at least put up artistic ones.
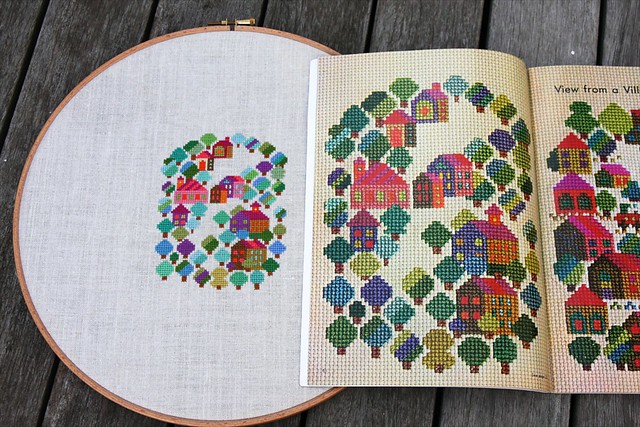
I've been working on this cross stitch since the Olympics - I thought I'd get it done by the closing ceremonies but didn't make it, and then it languished as I wrestled with amigurumi and other crochet stuff.
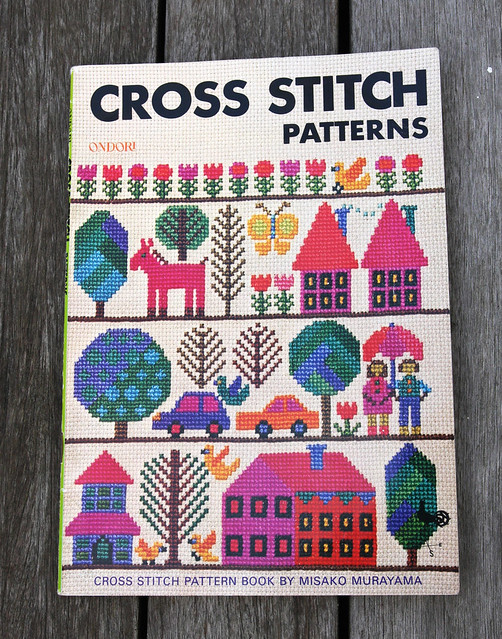
The design comes from a neat little cross stitch book, Cross Stitch Patterns by Misako Murayama, that came with a Gerda Bengtsson book I wanted on Trade Me. As it turns out, it was much more fun that the Bengtsson one so I was quite pleased. It reminds me a bit of the book I had when I was learning to cross stitch as a kid, so it's kind of nostalgic.
The colours came as a bit of a surprise when I started, though it shouldn't have considering I saw all the floss together when I bought it! The book's colours are quite different, much more muted. But I quite like the insane brightness.
When I searched for it online to see if I could learn a bit more about it, or the author, I got a bit of a shock at the prices that were being asked for it - Amazon sellers had it for $45+, Alibris had it from $73-314. Wow. I payed $10 for two books, so essentially $5. I felt quite proud of myself for scoring such a rare book accidentally, although $314 seemed a bit crazy. I mentioned to Heleen that I was doing an embroidery from this particular book, and from my vague description of the patterns "70s, Japanese, colourful" she popped out of the room and returned with her copy, which cost her all of $2 in a second hand book store! Needless to say the $314 seems even more ridiculous now - where do they pull these prices out from? I'll refrain from suggesting a place because I might get unwanted hits on my blog from Google searches ;)
After I took these photos I stupidly left the hoop lying on the spare bed, and Lucy the cat promptly slept on it, put a claw through it, and got it dirty. Luckily none of the damage is permanent, but I'll have to wash it and will probably put it in a smaller hoop to hang on the wall. Cats!
I've been working on this cross stitch since the Olympics - I thought I'd get it done by the closing ceremonies but didn't make it, and then it languished as I wrestled with amigurumi and other crochet stuff.
The design comes from a neat little cross stitch book, Cross Stitch Patterns by Misako Murayama, that came with a Gerda Bengtsson book I wanted on Trade Me. As it turns out, it was much more fun that the Bengtsson one so I was quite pleased. It reminds me a bit of the book I had when I was learning to cross stitch as a kid, so it's kind of nostalgic.
Copyright 1976 by Ondorisha Publishers ISBN 0-87040-374-5
The colours came as a bit of a surprise when I started, though it shouldn't have considering I saw all the floss together when I bought it! The book's colours are quite different, much more muted. But I quite like the insane brightness.
When I searched for it online to see if I could learn a bit more about it, or the author, I got a bit of a shock at the prices that were being asked for it - Amazon sellers had it for $45+, Alibris had it from $73-314. Wow. I payed $10 for two books, so essentially $5. I felt quite proud of myself for scoring such a rare book accidentally, although $314 seemed a bit crazy. I mentioned to Heleen that I was doing an embroidery from this particular book, and from my vague description of the patterns "70s, Japanese, colourful" she popped out of the room and returned with her copy, which cost her all of $2 in a second hand book store! Needless to say the $314 seems even more ridiculous now - where do they pull these prices out from? I'll refrain from suggesting a place because I might get unwanted hits on my blog from Google searches ;)
After I took these photos I stupidly left the hoop lying on the spare bed, and Lucy the cat promptly slept on it, put a claw through it, and got it dirty. Luckily none of the damage is permanent, but I'll have to wash it and will probably put it in a smaller hoop to hang on the wall. Cats!
27 September, 2012
Crocheted spring bunny
My crochet obsession continues - though at the moment I'm working on next month's homework for the Monday Modern quilt group. One of my ambitions when I started crochet was to be able to make amigurumi. Everyone assured me that they were actually quite easy, so I got a book out from the library called Amigurumi for Dummies and tried to make a hamster. I tried starting about 8 times and none of them worked. Either the stitches got so tight as I went around that I literally couldn't get the hook into them, or the yarn fuzzed up so much I couldn't see what I was doing. Talk about demoralising - I couldn't even master a pattern from a book for dummies! Then I saw the start of Helen's little Spring Bunny and was so impressed with how she was going on her first attempt I thought it might be a good pattern to start with. Plus I've had it Pinned for quite awhile now, and it's always good to make things from Pinterest occasionally just to legitimise all the time I spend on there (though not so much these days I have to say). And I can report that yes it's a great beginner pattern and I have succeeded and I feel inordinately proud of myself! I haven't put the felt on the feet yet, but I'm half-inclined not to, I'll see what Hazel thinks.
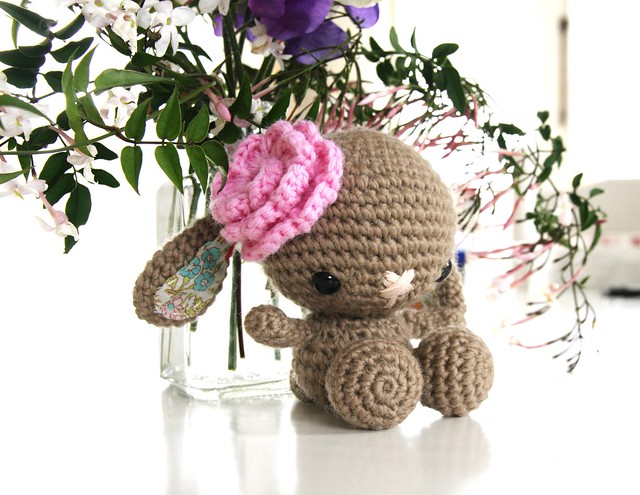
I think the success is down to the pattern and the wool/hook combination. Helen was using a slightly felted 8ply by Harmony, and my bunny is done in a similar, though slightly thicker 8ply called Aspire by Naturally. It's 70% wool and 30% alpaca and gorgeously soft. I used a 3.5 hook. The first few rounds of the head were a bit dodgy as I was trying to figure out how to use a row marker, but once I got that down it went pretty well. The only problem I had was the fact that if I get even slightly distracted I can't remember if I'm on the SC or the SC2tog and have to pull out a few stitches to figure it out (or a whole row!). I also mastered the invisible decrease which isn't nearly as hard as it looks in the diagrams. Always nice when that happens :) Now I can try a few larger items. Mat and Hazel have already put in orders but I'll see what takes my fancy I think!

I think the success is down to the pattern and the wool/hook combination. Helen was using a slightly felted 8ply by Harmony, and my bunny is done in a similar, though slightly thicker 8ply called Aspire by Naturally. It's 70% wool and 30% alpaca and gorgeously soft. I used a 3.5 hook. The first few rounds of the head were a bit dodgy as I was trying to figure out how to use a row marker, but once I got that down it went pretty well. The only problem I had was the fact that if I get even slightly distracted I can't remember if I'm on the SC or the SC2tog and have to pull out a few stitches to figure it out (or a whole row!). I also mastered the invisible decrease which isn't nearly as hard as it looks in the diagrams. Always nice when that happens :) Now I can try a few larger items. Mat and Hazel have already put in orders but I'll see what takes my fancy I think!
21 September, 2012
The lazy woman's guide to making wonky stars
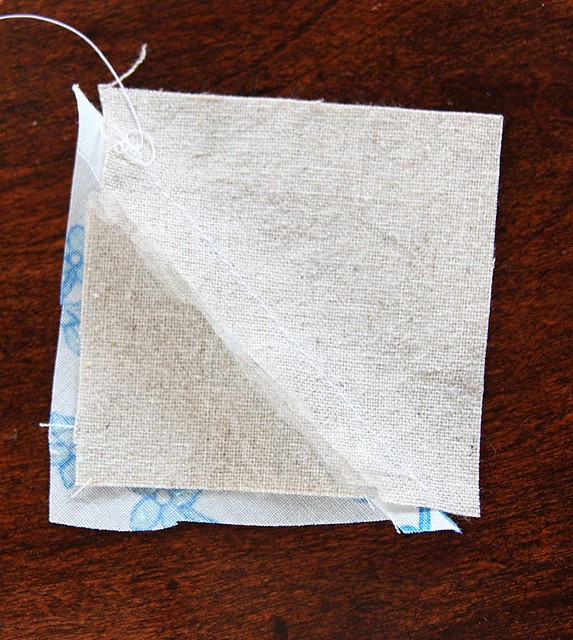
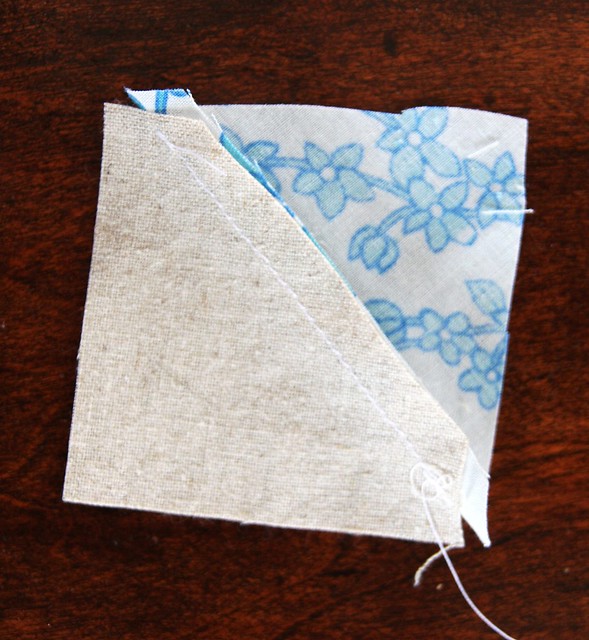
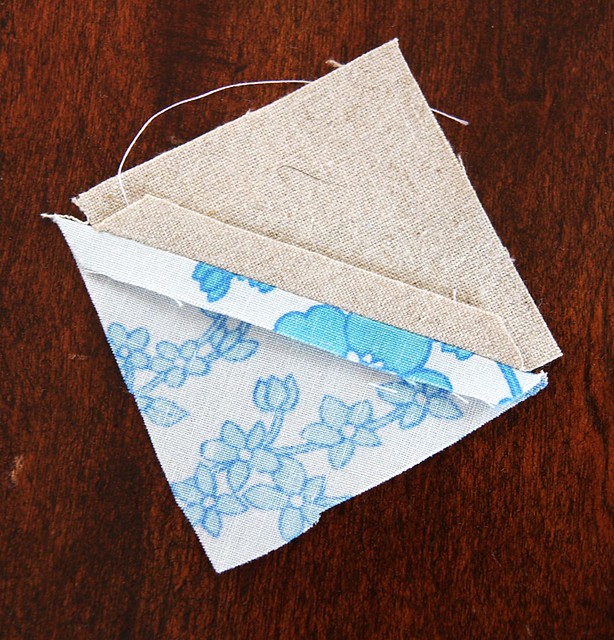
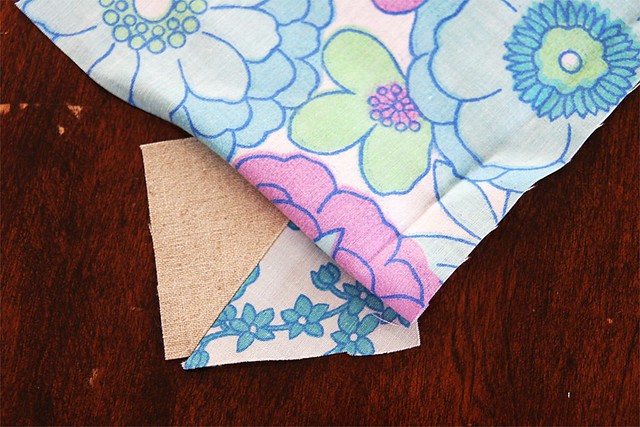
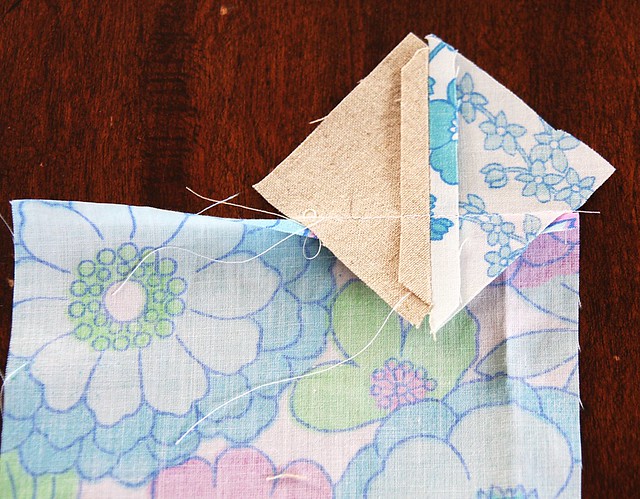
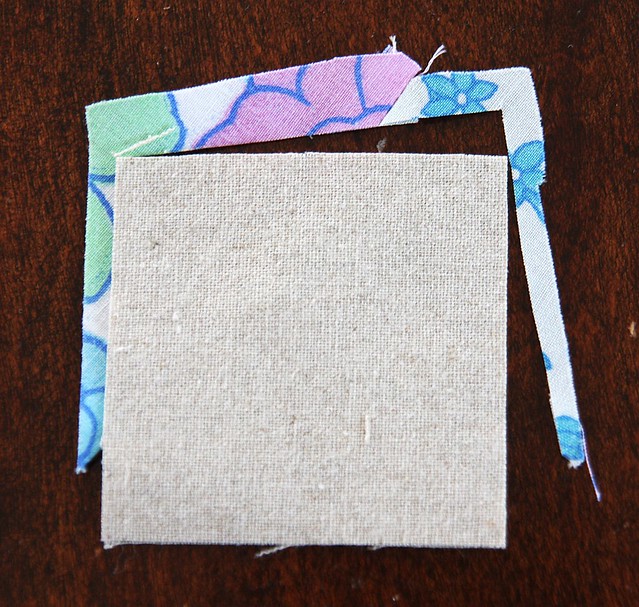
I like efficiency. I like finding a better, quicker, easier way to do anything. And really all that boils down to the fact that I'm, at heart, a very lazy person. If I can expend less energy getting from A to B then I'm all for it. So when I read instructions for wonky stars that want me to cut out lots of squares from various fabrics for the star points then my immediate thought is "do I really have to?". And no, it's not necessary, any old scrap will do if it's big enough as many other tutorials will tell you. But then I had issues with sewing on scraps and they wouldn't fit because I'd estimated wrong - unpicking the seam is time I could spend playing on the internet or with my iPhone, so that was just unacceptable. I also didn't like the wastage involved with some methods I've seen online. Fabric is expensive here in NZ, I'm not throwing away more than I need to. Lazy and cheap - that's me! So I started doing it this way. I'm sure I'm not the only person who does it this way, nor the first to document it, but I thought if it helped just one person spend more time on Instagram I would be doing the world a favour. This isn't a proper tutorial on doing a wonky star, just on making the sections. If you'd like to try making one I really like this tutorial at Oh Fransson!, although you have to add in the extra corner squares if you aren't joining them all together like she does.
The thing I like about doing it this way is that it doesn't matter if you have a small scrap or a large one, and if it's large you can just work in from the edge as you make stars and you don't waste as much as you would if you precut bits. Admittedly, I wasn't quite as careful with the first fabric in this tutorial as I would normally be, but hopefully you get the picture!
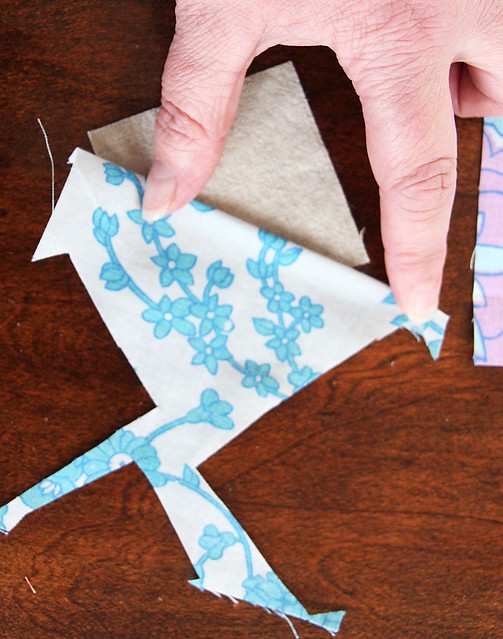
Select your first piece of fabric and fold over the edge about 1/4". It doesn't have to be exact but it does need to be even (please excuse the out-of-focus photos, the camera decided to focus on my wrinkly old hands instead). I finger crease it slightly.
Then flip it over and figure out where you want it on your square.
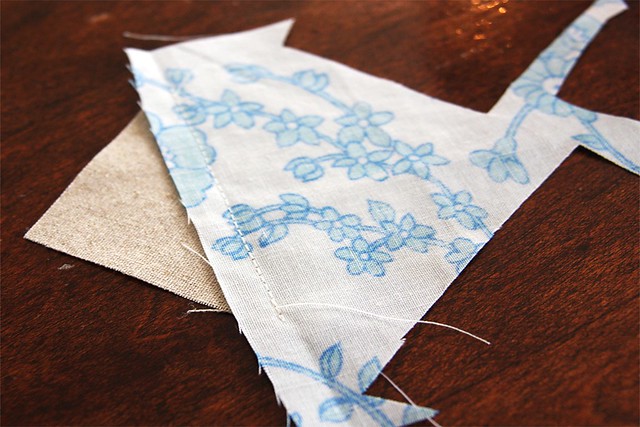
Once you have it where you want it, carefully flip it over and sew along the crease line. I usually just wiggle a couple finger tips under to grab the edge and keep it in place while flipping.
I then open the fabric out and flip it over so I can see the background square. If you can't see fabric all around the background square then you'll need to unpick the seam and try again.
I trim around this to get rid of the excess, leaving a little extra just in case (I forgot and trimmed off the corner before I cut around it, don't be like me! I've Photoshopped it back together, if only we could do that in real life...).
Then trim off the excess background square. To be honest I don't really see the point in worrying whether this is 1/4" or not - who's going to see it? As long as it's wide enough things don't fray through and it's fairly even I call it good enough.
I usually press open my seam with the iron at this point, although you certainly don't have to and can just finger press, I just think it means less distortion and the square will sit flatter in the end.
Now repeat with the second fabric. Position it on the square with the edge folded over
Flip, and sew down the crease.
Open up the fabric and trim around the corner. Oh look, cat fur is stuck in the seam! Typical.
The corner will be a bit wonky from adding the first fabric but as long as you allow a smidge extra you won't get caught short when you open it out, which I know from experience is a seriously curse-worthy moment!
And then trim off the excess corner and press open the seam
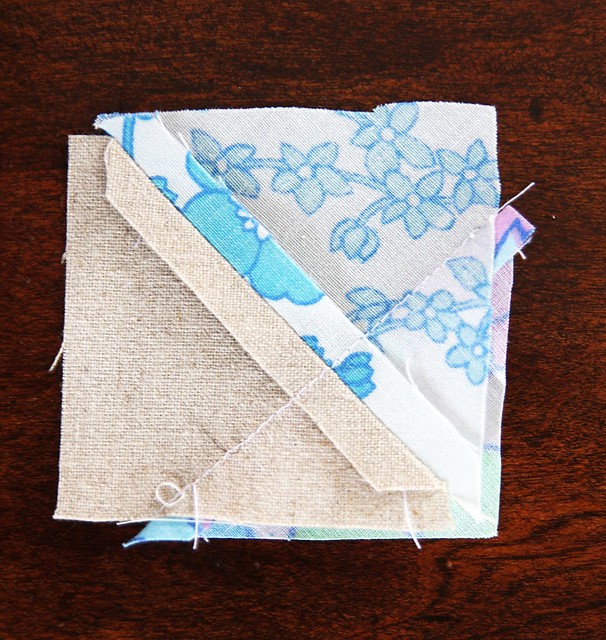
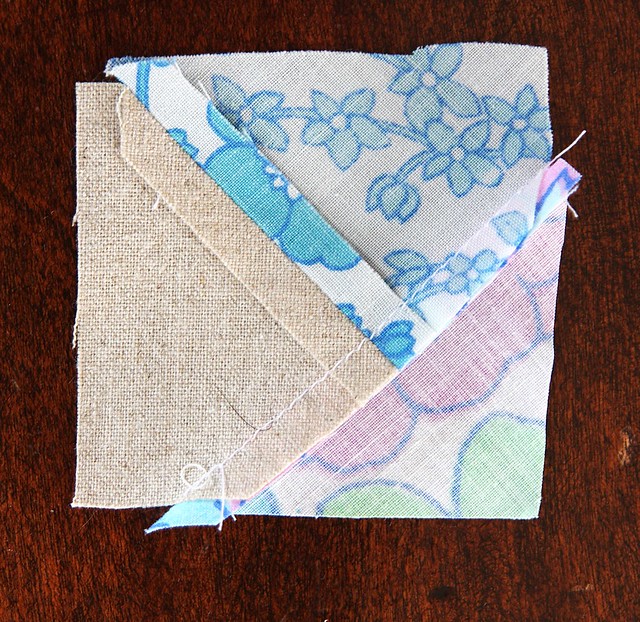
Now the square needs to be trimmed.
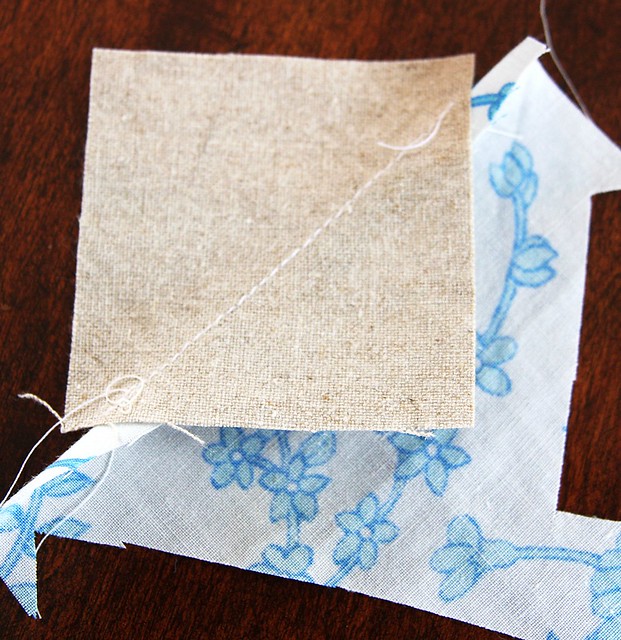
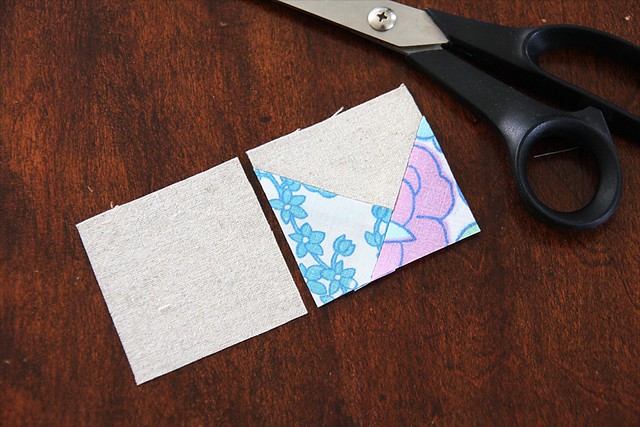
Why pfaff around with a cutting mat when you have a perfect square of just the right size sitting next to you - just grab one of the unused background squares, position it over the top and trim around it carefully. I find this is a great way to square things up again if they've become a bit distorted by the sewing and pressing and much easier to do with another square than to try and figure out on a cutting board.
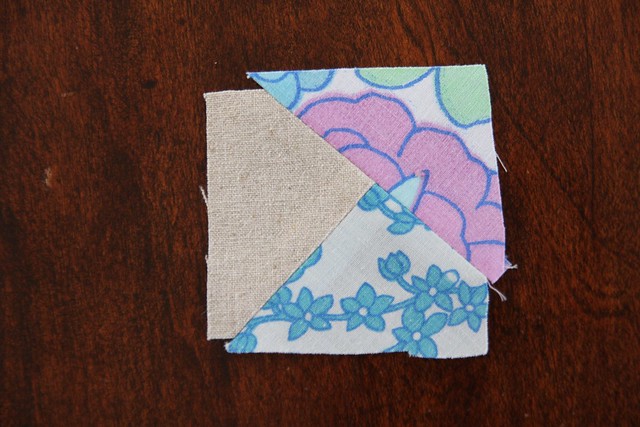
Et voila! A perfect little square all ready to go.
17 September, 2012
Vintage sheet wonky stars
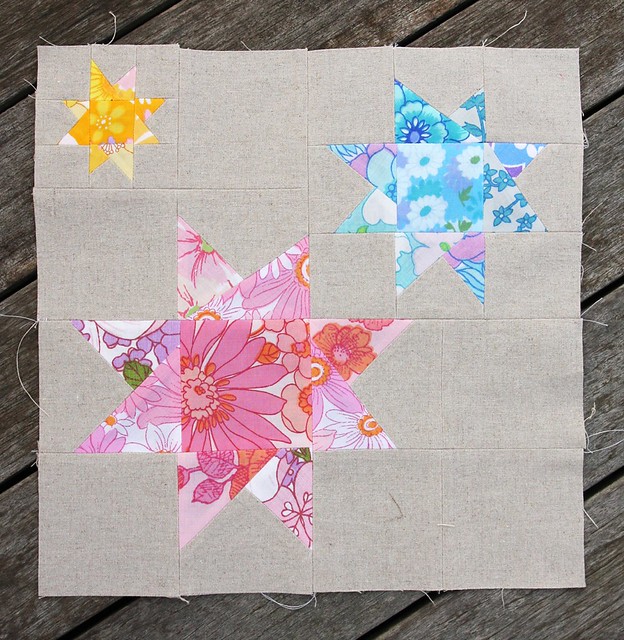
I made up this block as a sample to show the bee participants. I love it! I had this vision in my head of what the quilt would look like when I came up with the idea, and I think it might actually look even better in reality (which as you crafty people know isn't always the case!).
I used a star block from the Modern Blocks book to get me started, but will do up some different ones to keep things from looking too samey-samey. I really did feel that I didn't have enough variety in the sheets when I was making this up, when of course I have heaps - maybe I need help?
ETA: You can see more of my blocks over at Jaffa Quilts and Milly Made It - it was such a thrill when Megan and Karyn's posts popped up in my reader over the weekend - I can see why people get addicted to bees! I love the variations they've come up with, and I need to get working on my own.
Labels:
bee,
linen,
Monday night quilt group,
vintage sheet,
wonky star
14 September, 2012
Lilla Handlebar Basket
Waaaay back in March I bought the Lilla Handlebar Basket pattern from Hemma design and ordered oilcloth and started out to make Hazel a basket. I got about 1/3 of the way in and it kind of fell by the wayside. There was a lot of gluing involved and I couldn't seem co-ordinate myself to do the gluing at times when I could let it dry and then get on to the sewing later. A couple weeks ago I had a fit of wanting to get some UFOs finished, and this was one of them (I still have too many to list here though).
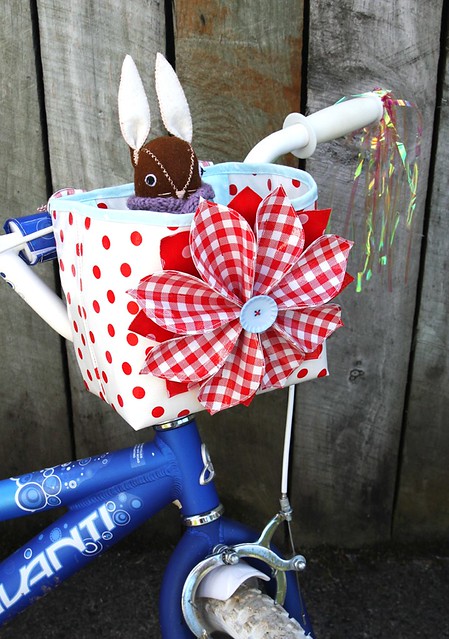
One of the things that prodded me in to doing it was Hazel wanting to take stuffed animals with her on rides but not being able to since we've taken off the little doll's seat at the back of her bike. So for all your stuffed animal transport needs:
If you look at the pattern photo, you'll see Hazel didn't want to mess with perfection in terms of which oilcloth we used, which was fine by me! I ordered mine from La Cuisine and it came super-fast. I've never used oilcloth before but it seems nice and it's not horrible and thick like I always think of oilcloth being. It sewed up really easily too, I was surprised that I had no issues with my foot sticking to it, and the needle went through easily. I had some tension issues, and the seams looked a bit untidy but other than on the flower at the front they aren't visible anyways so it didn't really matter. The pattern itself went together very nicely, even if there is a lot of gluing, but I had to do a bit of fiddling to make sure the lining pieces were the right size for the outer before committing myself with the glue! Parts of the lining were too small, and parts were a bit too big, and it's not like you can stretch or ease oilcloth to fit!
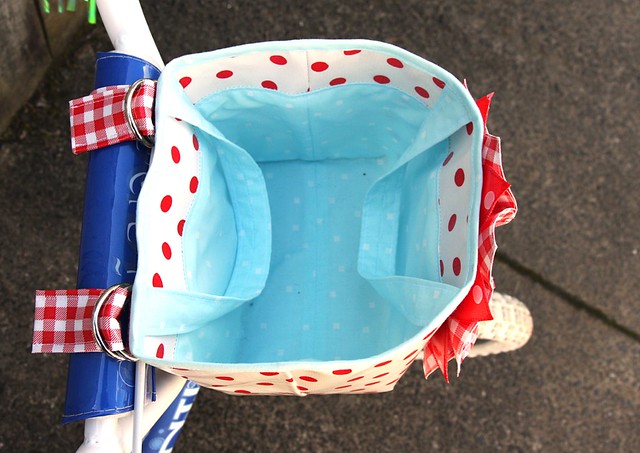
She hasn't used it as a handbag yet, but I wouldn't recommend carrying heavy things in it, the handles are only held on with a narrow hem at the top. It's also a bit of a bitch to get on and off because the straps are very thick and don't bend easily.
One of the things that prodded me in to doing it was Hazel wanting to take stuffed animals with her on rides but not being able to since we've taken off the little doll's seat at the back of her bike. So for all your stuffed animal transport needs:
If you look at the pattern photo, you'll see Hazel didn't want to mess with perfection in terms of which oilcloth we used, which was fine by me! I ordered mine from La Cuisine and it came super-fast. I've never used oilcloth before but it seems nice and it's not horrible and thick like I always think of oilcloth being. It sewed up really easily too, I was surprised that I had no issues with my foot sticking to it, and the needle went through easily. I had some tension issues, and the seams looked a bit untidy but other than on the flower at the front they aren't visible anyways so it didn't really matter. The pattern itself went together very nicely, even if there is a lot of gluing, but I had to do a bit of fiddling to make sure the lining pieces were the right size for the outer before committing myself with the glue! Parts of the lining were too small, and parts were a bit too big, and it's not like you can stretch or ease oilcloth to fit!

She hasn't used it as a handbag yet, but I wouldn't recommend carrying heavy things in it, the handles are only held on with a narrow hem at the top. It's also a bit of a bitch to get on and off because the straps are very thick and don't bend easily.
11 September, 2012
The lows and highs of crochet

I've decided to make my first crochet project a cushion cover and not a big blanket so I can get on to trying out other things. My initial plan was to crochet the squares together using this tutorial, but I really didn't like the look of it when I was finished. The squares looked all wonky and the white toned the whole thing down and the lovely (some might say rather insane) brightness was totally gone. Crochet Fail.
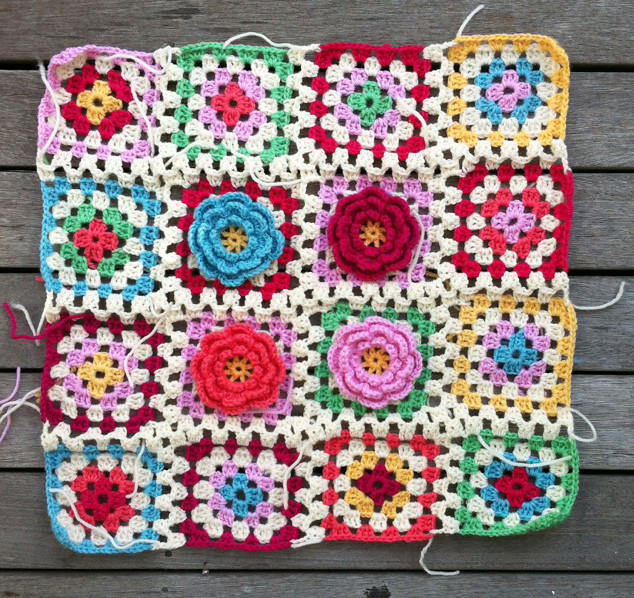
I'm pretty sure the wonkiness was something I'd done wrong (I think there's an extra treble in the intersections now that I look at it) and if I'd liked the effect of the white I would have gone back and tried to fix it - but I didn't so all the white was pulled out this morning and I've gone another way - more on that later!
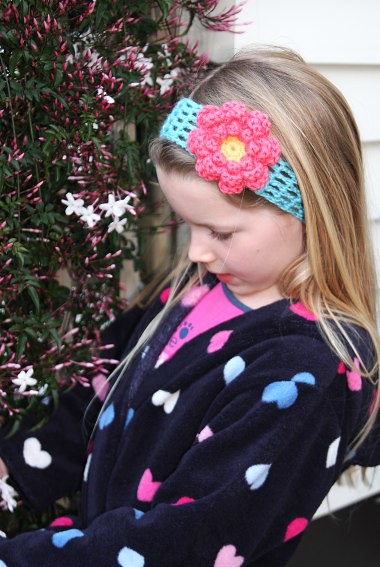
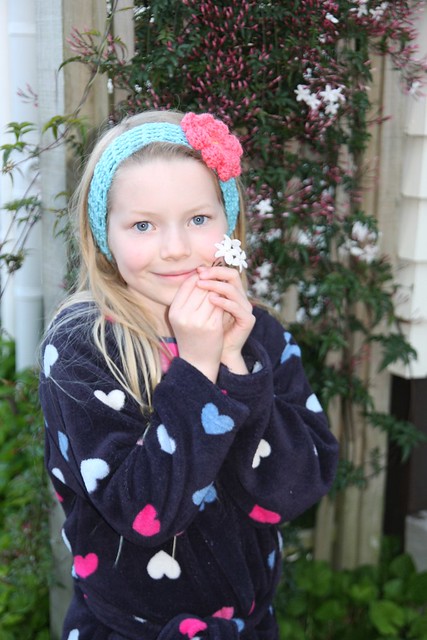
Crochet came to the rescue yesterday though, when Hazel was given a birthday party invitation that had gone astray and the party was this afternoon after school! In the end she couldn't go because of prior commitments, but I thought a little present was in order anyways. I'd seen something a few days ago about crochet headbands with flowers and since I had several flowers hanging around after my experiments with putting them in squares I thought it would be an idea solution. Talk about a fast present! I googled for a pattern, came up with this great video, and half an hour later I had a headband. I stupidly didn't keep watching after I'd finished the band because she had this really neat way of attaching the flower, but mine was fine just stitched on. Hazel modelled it for me late in the afternoon. She was a bit put out about having to do it because she's not keen on headbands, but got into the spirit fairly quickly! And no, I don't know why she was in her pyjamas before dinner!
05 September, 2012
Wonky star bee blocks
For my Monday Modern group bee blocks I'm asking everyone to make me wonky stars using linen and vintage sheets. Everyone got a small bundle with an assortment of pink, blue, yellow and 'white' sheet scraps. The white are actually prints that have a lot of white background and soft colours, and I've included some solid white fabric just to make it more obvious.
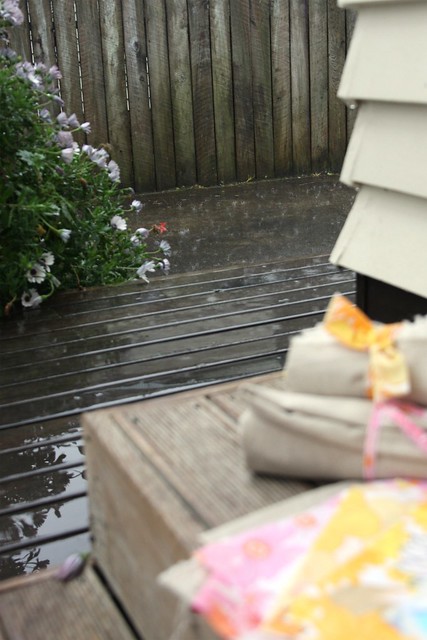
I'm really very excited about this bee! I had to laugh at myself a bit though, while taking this bright and happy photo because look what it was doing just out of frame...
...just bucketing down! In fact, by the time I took the top photo it was raining so hard that it was bouncing up off the deck (which is covered all the way to the steps out there btw) and getting on the fabric - if you look hard at the pink on the left you can see the raindrops.
Subscribe to:
Comments (Atom)
